¶ RevitAppExtension Developer Documentation
¶ Overview
RevitAppExtension is a template for creating Revit add-ins that integrate with Assistant. This template provides a foundation for building MVVM-based Revit applications with a modern UI using WPF-UI.
¶ Getting started
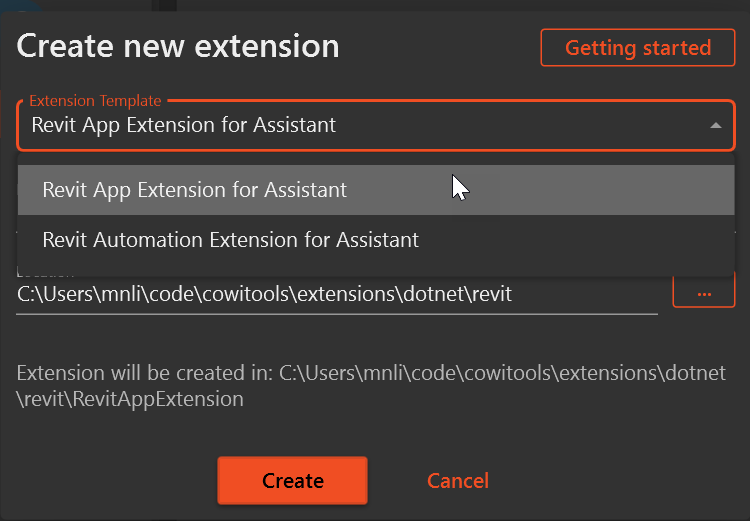
Create a new Extension by selecting the template "Revit App Extension for Assistant"
¶ Glossary
- MVVM - Model-View-ViewModel, a design pattern that separates the user interface from business logic and data
- WPF-UI - A modern UI library for Windows Presentation Foundation that follows Windows 11 design language
- Revit Context - Any operation that uses the Revit API, requiring access to the Revit application, document, or other Revit objects
- CQRS - Command Query Responsibility Segregation, a pattern that separates read operations (queries) from write operations (commands)
- DI - Dependency Injection, a technique where an object receives other objects it depends on
- Constructor Injection - The act of defining the list of required Dependencies by specifying them as parameters to the class’s constructor.
- IFluentCommand - Interface for commands that allow method chaining to create sophisticated command flows
- ViewModel - A component that converts model information into values that can be displayed in a view
- Data Binding - The process that establishes a connection between the UI and business logic
- Command Pattern - A behavioral design pattern that turns a request into a stand-alone object
¶ Project Structure
The template is organized according to the MVVM (Model-View-ViewModel) pattern:
- CQRS/ - Contains commands and queries for handling logic that requires Revit context with Command Query Responsibility Segregation pattern
- ViewModels/ - Contains the view models that drive the UI behavior
- Views/ - Contains the XAML views for the UI
- Resources/ - Contains shared resources like view bindings
- RevitAppExtensionCommand.cs - The entry point for the Revit extension
- RevitAppExtensionArgs.cs - Initial configuration that will be passed into the app on startup.
¶ Entry Point and Initialization
The application starts with RevitAppExtensionCommand.cs, which implements the IRevitExtension<T> interface. The Run method is the entry point:
public IExtensionResult Run(IRevitExtensionContext context, RevitAppExtensionArgs args, CancellationToken cancellationToken)
{
    // Check if a document is open
    var document = context.UIApplication.ActiveUIDocument?.Document;
    if (document is null)
        return Result.Text.Failed("Revit has no active model open");

    // Create service provider and register dependencies
    var provider = ServiceFactory.Create(context.UIApplication, services =>
    {
        services.RegisterAppServices(args);
    });

    // Show the main window
    WindowHandler.ShowWindow<MainWindow>(provider, context.UIApplication.MainWindowHandle);

    return Result.Text.Succeeded("Application was started");
}
¶ Initial User Input
Initial user inputs are handled through the RevitAppExtensionArgs class:
public class RevitAppExtensionArgs
{
    public string? InitialComment { get; set; }
    // Add additional properties here as needed
}
This class can be extended with additional properties to capture different types of user input required for your application. Properties in this class are automatically parsed into UI elements in the Extension Task configuration in Assistant.
¶ Dependency Registration
Dependencies are registered in the Registrations.cs file using the .NET Dependency Injection framework. The template uses a RegisterAppServices extension method on IServiceCollection to configure all required services:
public static IServiceCollection RegisterAppServices(this IServiceCollection services, RevitAppExtensionArgs args)
{
    // Register user arguments
    services.AddSingleton(args);

    // Register CQRS handlers from the assembly
    services.AddCqrs(typeof(Registrations).Assembly);

    // Register UI components and view models
    services.AddSingleton<MainWindow>();
    services.AddSingleton<HomeViewModel>();
    services.AddSingleton<AboutViewModel>();
    services.AddSingleton<IContentDialogService, ContentDialogService>();

    // Add additional services here

    return services;
}
When adding new view models or services:
- Create your new service/view model class
- Add the registration in
RegisterAppServicesmethod - For services with interfaces, register the interface and implementation:
services.AddSingleton<IMyService, MyService>()
¶ View-ViewModel Binding
Views and ViewModels are connected through data templates in ViewBindings.xaml:
<ResourceDictionary>
    <DataTemplate DataType="{x:Type viewModels:HomeViewModel}">
        <views:HomeView />
    </DataTemplate>

    <DataTemplate DataType="{x:Type viewModels:AboutViewModel}">
        <views:AboutView />
    </DataTemplate>
</ResourceDictionary>
This approach enables:
- Automatic view resolution from view models
- Navigation using view models rather than views
- Clean separation between UI and business logic
When adding a new view and view model:
- Create your view model class in the ViewModels folder
- Create your view XAML and code-behind in the Views folder
- Add a data template mapping in ViewBindings.xaml
¶ View Model Structure
The template follows a specific pattern for view models:
¶ Base View Model
All view models inherit from RevitViewModelBase which provides common functionality:
- Property change notification
- Command creation
- CQRS integration
¶ Command Types in ViewModels
The template supports two different command patterns depending on whether the command needs Revit context or not:
- Commands that require Revit context - Use the
Send<TQuery, TResult>()pattern - Commands that don't require Revit context - Use the
Do(Method)pattern
¶ HomeViewModel Example (Revit-dependent commands)
public class HomeViewModel : RevitViewModelBase
{
    // Injected services
    private readonly IContentDialogService _contentDialogService;
    private readonly ISnackbarService _snackbarService;

    // Properties with notification
    public string? CurrentDocumentTitle
    {
        get => Get<string?>();
        set => Set(value);
    }

    public string? Comment
    {
        get => Get<string?>();
        set => When(value)
                .Notify(SetCommentOnSelectedElementsCommand)
               .Set();
    }

    // Constructor with dependency injection
    public HomeViewModel(
        ViewModelBaseDeps dependencies,
        RevitAppExtensionArgs args,
        IContentDialogService contentDialogService,
        ISnackbarService snackbarService
        ) : base(dependencies)
    {
        Comment = args.InitialComment;
        _contentDialogService = contentDialogService;
        _snackbarService = snackbarService;
    }

    // Commands using Send<> pattern for Revit-dependent operations
    public IFluentCommand GetCurrentDocumentCommand =>
            Send<GetDocumentTitleQuery, GetDocumentTitleQueryResult>()
            .Then(o => CurrentDocumentTitle = o.Title);

    public IFluentCommand SetCommentOnSelectedElementsCommand =>
            Send<SetCommentOnSelectedElementsQuery, SetCommentOnSelectedElementsQueryResult>(() => new(Comment))
            .If(() => !string.IsNullOrEmpty(Comment))
            .Handle(OnSetCommentsFailed)
            .Then(o => _snackbarService.Show("Comments set", o.Message, Wpf.Ui.Controls.ControlAppearance.Primary));
}
¶ AboutViewModel Example (Non-Revit-dependent commands)
public class AboutViewModel(ViewModelBaseDeps dependencies, ISnackbarService snackbarService) : RevitViewModelBase(dependencies)
{
    // Simple command using Do() pattern for non-Revit operations
    public IFluentCommand ShowWikiCommand => Do(OpenWiki);

    private void OpenWiki()
    {
        var wikiUrl = "https://wiki.cowitools.com"; // Update to your actual wiki domain
        var startInfo = new ProcessStartInfo
        {
            FileName = wikiUrl,
            UseShellExecute = true,
            Verb = "open"
        };

        try
        {
            Process.Start(startInfo);
        }
        catch (Exception ex)
        {
            // Handle exception
            snackbarService.Show("Error", $"Failed to open wiki: {ex.Message}", Wpf.Ui.Controls.ControlAppearance.Danger);
        }
    }
}
¶ View Model Properties
The template provides a robust property system that supports change notification and command interactions:
¶ Property System Methods
Get<T>()- Retrieves a property value from the view model's internal storageSet(value)- Sets a property value and raises change notificationWhen(value)- Begins a fluent API chain for more complex property updatesNotify(command)- Notifies a command that it should re-evaluate its executable stateSet()- Completes the property setting operation (used at end of a chain)
¶ Property Examples
// Simple property with basic change notification
public string? CurrentDocumentTitle
{
    get => Get<string?>();
    set => Set(value);
}

// Advanced property with command notification
public string? Comment
{
    get => Get<string?>();
    set => When(value)            // Start a property update chain with the new value
            .Notify(SetCommentOnSelectedElementsCommand)  // Notify the command when this property changes
           .Set();                // Complete the property update operation
}
The Notify() method is particularly important as it informs commands that a property they depend on has changed. When the Comment property changes:
- The
When(value)method starts a chain for the new value - The
Notify(SetCommentOnSelectedElementsCommand)tells the command to re-evaluate its executable state- This causes the command to check its condition specified in
.If(() => !string.IsNullOrEmpty(Comment)) - The button will be enabled or disabled based on whether Comment is empty or not
- This causes the command to check its condition specified in
- The
.Set()method completes the property update and triggers UI refresh
This property system creates a reactive UI where:
- Properties automatically notify the UI of changes
- Commands automatically update their enabled state
- The UI responds to property changes without additional code
¶ View Structure
Views are created using WPF and the WPF-UI library for modern UI components.
¶ HomeView Example
<UserControl x:Class="RevitAppExtension.Views.HomeView"
             xmlns="http://schemas.microsoft.com/winfx/2006/xaml/presentation"
             xmlns:ui="http://schemas.lepo.co/wpfui/2022/xaml"
             d:DataContext="{d:DesignInstance Type=viewmodels:HomeViewModel}">
    <Grid>
        <!-- UI Components -->
        <ui:TextBlock Text="{Binding CurrentDocumentTitle}"/>
        <ui:Button Content="Get document title"
                   Command="{Binding GetCurrentDocumentCommand}"/>
        <ui:TextBox Text="{Binding Comment, UpdateSourceTrigger=PropertyChanged, Mode=TwoWay}"/>
        <ui:Button Content="Set Comment"
                   Command="{Binding SetCommentOnSelectedElementsCommand}"/>
    </Grid>
</UserControl>
Key aspects of views:
- Use WPF-UI components (
ui:Button,ui:TextBlock, etc.) - Bind directly to view model properties using
{Binding PropertyName} - Use design-time support with
d:DataContext - Use converters for UI state management
¶ WPF UI Framework
This template utilizes the WPF UI framework, a modern UI library designed to create desktop applications with a fresh, consistent look and feel that follows the Windows 11 design language.
¶ Learn More
To learn more about the WPF UI framework and its capabilities:
- Visit the official website: https://wpfui.lepo.co/
- Download the WPF UI Gallery app to explore all available components, icons and their customization options
- Check out the GitHub repository: https://github.com/lepoco/wpfui
¶ Command Patterns & Fluent API
The template provides a fluent API for creating commands through the IFluentCommand interface with extension methods that support method chaining:
¶ Command Methods and Extensions
Send<TQuery, TResult>()- Creates a command that will execute a query handler with Revit contextDo(Action method)- Creates a command that executes a simple action with no Revit context neededIf(Func<bool> condition)- Adds a condition that must be true for the command to executeHandle(Func<Exception, Task> handler)- Specifies how to handle exceptions if they occurThen(Action<TResult> onSuccess)- Specifies the action to take when the command completes successfullyCancelCommand- Automatically available on commands created withSend<>()to cancel long-running operations
¶ Command Patterns
Here's an example of how these extension methods can be chained together to create sophisticated command flows:
public IFluentCommand SetCommentOnSelectedElementsCommand =>
        Send<SetCommentOnSelectedElementsQuery, SetCommentOnSelectedElementsQueryResult>(() => new(Comment))
        .If(() => !string.IsNullOrEmpty(Comment))   // Only execute if condition is true
        .Handle(OnSetCommentsFailed)                // Error handling
        .Then(o => ShowSuccessMessage(o.Message));  // Success callback
¶ CQRS Pattern
The template uses the Command Query Responsibility Segregation (CQRS) pattern:
- Queries: Used for retrieving data (e.g.,
GetDocumentTitleQuery) - Commands: Used for performing actions (e.g.,
DeleteSelectedElementsCommand)
¶ Query Example
// Query definition
public class GetDocumentTitleQuery : IQuery<GetDocumentTitleQueryResult>;
public record GetDocumentTitleQueryResult(string Title);

// Query handler
public class GetDocumentTitleQueryHandler : IQueryHandler<GetDocumentTitleQuery, GetDocumentTitleQueryResult>
{
    public GetDocumentTitleQueryResult Execute(GetDocumentTitleQuery input, CancellationToken cancellationToken)
    {
        // Implementation
    }
}
¶ Command Example
// Command definition
public class DeleteSelectedElementsCommand;

// Command handler
public class DeleteSelectedElementsCommandHandler : ICommandHandler<DeleteSelectedElementsCommand>
{
    public void Execute(DeleteSelectedElementsCommand input, CancellationToken cancellationToken)
    {
        // Implementation
    }
}
¶ Best Practices
-
Separation of Concerns
- Keep UI logic in views
- Keep presentation logic in view models
- Keep logic that require Revit context in commands and queries
- Do not pass Revit API objects outside the commands and queries
-
Dependency Injection
- Register all services in
Registrations.cs - Use constructor injection for dependencies
- Register all services in
-
MVVM Pattern
- No code-behind logic in views when possible
- Use commands for user actions
- Use data binding for UI updates
-
Error Handling
- Use the
.Handle()method on commands to manage errors - Provide user-friendly error messages
- Log exceptions for debugging
- Use the
¶ Extending the Template
¶ Adding a New Feature
- Define the Args - Add properties to
RevitAppExtensionArgsif needed - Create Commands/Queries - Add new files in the CQRS folder
- Create/Update ViewModels - Add commands and properties
- Create/Update Views - Design the UI and bind to the view model
- Register Dependencies - Add new services to
Registrations.cs - Connect Views - Add data templates to
ViewBindings.xamlif needed
¶ Debugging the Application
Use Visual Studio Code's Run and Debug view to start or attach the debugger:
- Open the Run and Debug view (Ctrl+Shift+D) or click the Run icon in the Activity Bar.
- Select the desired configuration from the dropdown at the top:
- Launch In Design Mode
- Attach to Revit
- Press F5 or click the green ▶️ play button to begin debugging.
-
Launch In Design Mode
- Use the
Launch In Design Modeconfiguration in.vscode/launch.json. - This starts the standalone executable with the
-c Designargument (bin/Design/RevitAppExtension.exe). - It uses
IDesignQueryHandler<TQuery, TResult>implementations in theCQRSfolder to provide mock data. - Set breakpoints in your design query handlers, e.g.
GetDocumentTitleDesignQueryHandlerorSetCommentOnSelectedElementsDesignQueryHandler.
- Use the
-
Attach to Revit
- Use the
Attach to Revitconfiguration in.vscode/launch.json. - Attaches the debugger to a running Revit process and uses live Revit API data.
- Use the
¶ Using IDesignQueryHandler
Implement design-time handlers by creating classes that implement IDesignQueryHandler<TQuery, TResult>:
internal class MyQueryDesignHandler : IDesignQueryHandler<MyQuery, MyQueryResult>
{
    public Task<MyQueryResult> HandleAsync(MyQuery request, CancellationToken cancellationToken)
    {
        // Return mock data for design mode
        return Task.FromResult(new MyQueryResult(/* mock values */));
    }
}
These handlers are automatically discovered and used when launching in Design Mode.
¶ Building and Deployment
The template includes configuration for multiple Revit versions. Use the appropriate configuration for your target Revit version:
- Release 2019
- Release 2020
- Release 2021
- Release 2022
- Release 2023
- Release 2024
- Release 2025
The Azure Pipelines configuration builds and packages the extension for all configured Revit versions. This is defined in azure-pipelines.yml
¶ Template Application Features
RevitAppExtension is only a template that you should change at your wish to make it fit your needs. In this section we will take a look at what features is implemented for demonstation purposes from a user prespective.
¶ Document Information
The application allows users to retrieve and display information about the current Revit document. The home screen shows the active document's title and provides a button to refresh this information.
¶ Element Comment Management
Users can apply comments to selected elements in Revit:
- Select one or more elements in your Revit model
- Enter a comment in the text field
- Click "Set Comment" to apply the comment to all selected elements
The application provides visual feedback through notifications when comments are successfully applied, and includes error handling for failed operations.
¶ Element Deletion
The application offers a way to delete selected elements from the Revit model.
¶ Navigation
The application uses a navigation system with:
- A home screen for containing the functionality described above
- An about screen with non-Revit dependent functionality.
- Fluid navigation between screens
¶ Indicators
For long-running operations the application provides:
- Ability to cancel operations in progress
- Success/failure notifications
¶ Initial User Input
The application can receive initial input at startup, in this exampe a pre-populated comment field is available.