¶ NWCExport — User Guide
This tool exports Navisworks NWC files from your Revit project.
¶ Before you start
- You must have a Revit model open.
- Navisworks Exporter must be installed on the machine running the export.
- You should have at least one 3D view available (the export only produces NWC from 3D views).
¶ Step-by-step workflow (start to finish)
¶ 1. Destination Folder
- Choose where the exported
.nwcfile(s) will be saved.
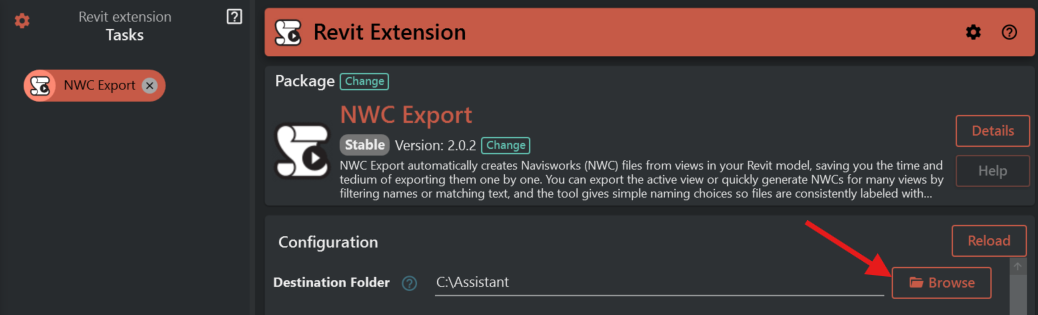
What it does
- Selects the folder where exported
.nwcfiles are saved.
When it appears
- Always.
Required?
- Yes.
If missing/invalid
- If empty: export stops and shows an error.
- If the folder does not exist: the tool tries to create it.
- If the folder cannot be accessed or created: export stops with an error.
¶ 2. Choose What To Export
- Pick how you want to select what to export.
- Depending on what you choose, additional fields will appear.
¶ Use Active View
What it’s for
- Export a single NWC from the view you are currently looking at.
Fields that become visible
- No additional selection fields. You only need Destination Folder and the naming/settings fields.
What it exports
- One
.nwcfile (from the active view).
Common mistakes (and how to avoid them)
- Active view is not a 3D view → Switch to a 3D view and run again.
- No active view available → Make sure a view tab is active in Revit.
¶ All 3D Views in Model
What it’s for
- Export all 3D views in the model.
Fields that become visible
- No additional selection fields.
What it exports
- Multiple
.nwcfiles (one per 3D view).
Common mistakes (and how to avoid them)
- Unexpected number of files → This exports every 3D view, so consider using Set Filter Rules or View Set if you only want a subset.
- Some views are skipped → Only 3D views are exported.
¶ Select View Set
What it’s for
- Export the views that are contained in a saved view set.
Fields that become visible
- View Set
What it exports
- Multiple
.nwcfiles (one per 3D view inside the selected view set).
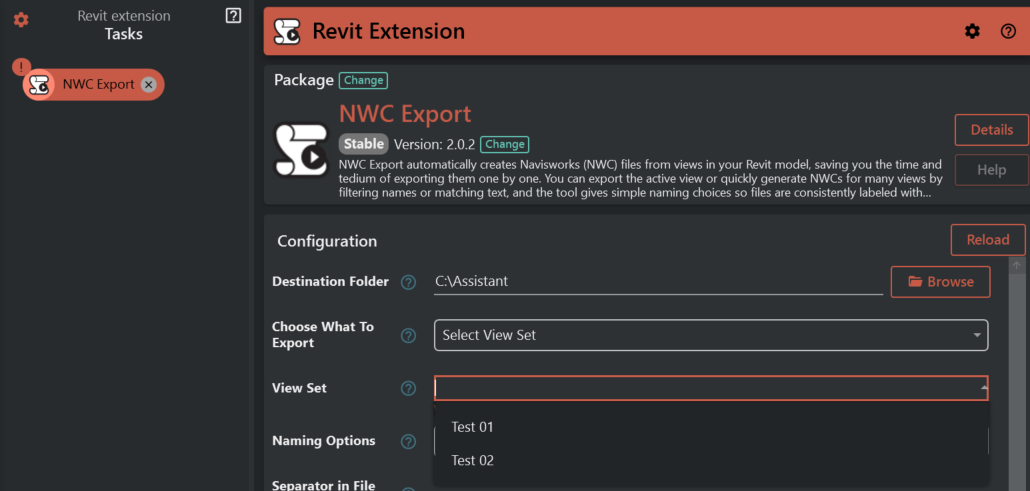
Common mistakes (and how to avoid them)
- View Set is empty → Choose a view set that actually contains views.
- View Set not found → Make sure the name matches an existing view set.
- Not all views export → Only 3D views inside the view set are exported.
¶ Use Regex In View Set
What it’s for
- Export views from any view set whose name matches a pattern.
Fields that become visible
- Regex Pattern
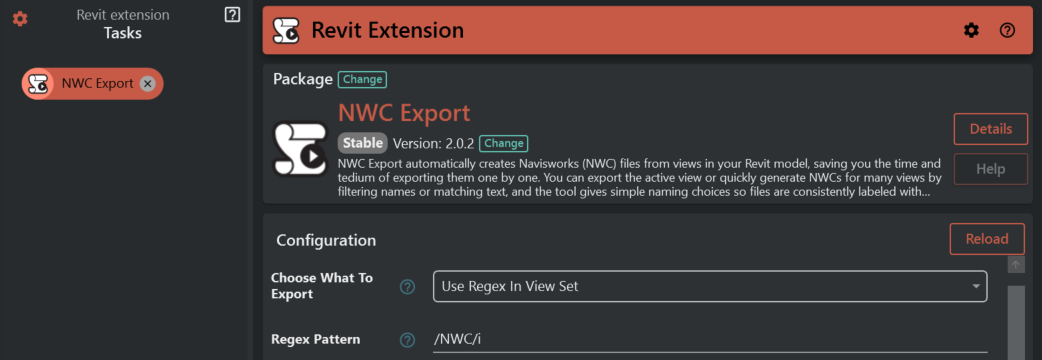
What it exports
- Multiple
.nwcfiles.- The tool checks view set names against your Regex Pattern.
- For each matching view set, it exports the 3D views inside that view set.
Common mistakes (and how to avoid them)
- Regex Pattern is empty → Enter a pattern.
- Invalid Regex Pattern → Simplify the pattern and try again.
- No view set matches the pattern → Adjust the pattern to match your view set naming.
¶ Set Filter Rules
What it’s for
- Export only the views that match rules you define.
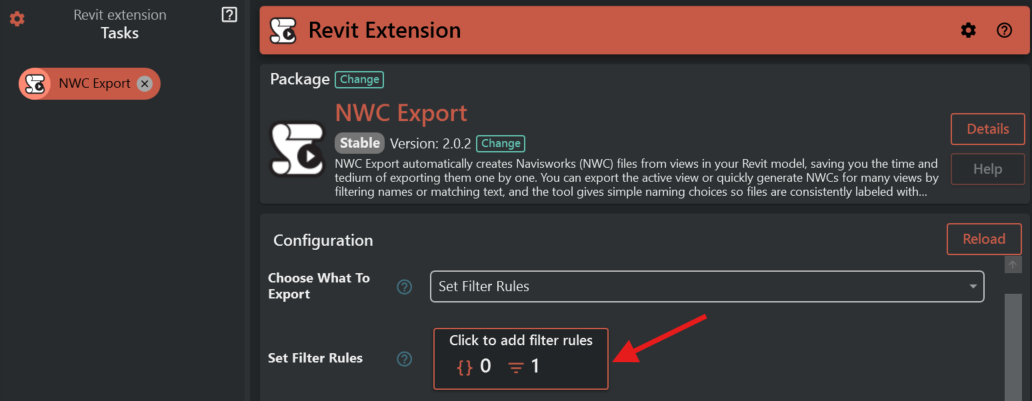
Fields that become visible
- Set Filter Rules
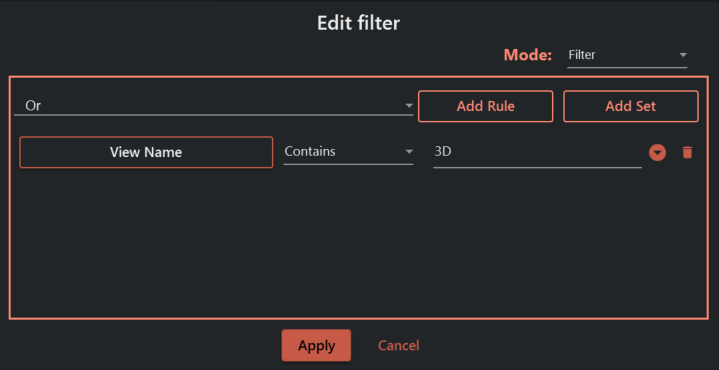
What it exports
- Multiple
.nwcfiles (one per matching 3D view).
Common mistakes (and how to avoid them)
- No rules set and too many exports → If you leave the rules empty, the selection may include many views; add rules to narrow it down.
- Nothing exports → Make sure your rules actually match existing 3D views.
- Some views are skipped → Only 3D views are exported.
¶ 3. Naming Options
Choose a naming style for the exported NWC's.
Depending on what you choose, you will either configure simple parts (separator/prefix/suffix) or define a fully custom name
What it does
- Controls how each exported file is named.
When it appears
- Always.
Required?
- Yes (a default is already selected).
If missing/invalid
- If an unsupported option is selected (rare): a safe fallback name is used.
Options you may see:
- ViewNameOnly
- ModelNameOnly
- ModelNameAndViewName
- ViewNameAndModelName
- CustomNamingConvention
How each option behaves is explained below.
¶ How file names are generated
¶ View Name Only
This option uses only the name of the view or sheet as the file name
¶ Model Name Only
This option uses only the model's name as the file name.
¶ Model Name And View Name
This combines the model name and the view name into the file name, separated by a defined separator.
¶ View Name And Model Name
This combines the view name and the model name into the file name, separated by a defined separator.
¶ Custom Naming Convention
This allows you to define your own naming pattern by typing a custom pattern in the Custom Naming Convention field.
What it does
- Lets you type a custom file name pattern.
- You can use placeholders like:
{ViewName}{ModelName}- Any view parameter name in braces (for example:
{Discipline},{Phase})

When it appears
- Only when Naming Options is Custom Naming Convention.
Required?
- Yes.
If missing/invalid
- If empty: the tool falls back to using the view name.
- If your pattern contains placeholders that don’t exist or don’t have values, those parts may remain unchanged or be left out (depending on what’s available).
¶ Separator in File Name
What it does
- The text inserted between name parts when a naming option combines multiple pieces.
When it appears
- Only when Naming Options is not Custom Naming Convention.
Required?
- Not required (a default
-is provided).
If missing/invalid
- If you clear it, names may be harder to read, but export can still run.
¶ Prefix in file name (Optional)
What it does
- Adds text at the start of every exported file name.
When it appears
- Only when Naming Options is not Custom Naming Convention.
Required?
- No.
If missing/invalid
- If empty, nothing is added.
¶ Suffix in file name (Optional)
What it does
- Adds text at the end of every exported file name (before
.nwc).
When it appears
- Only when Naming Options is not Custom Naming Convention.
Required?
- No.
If missing/invalid
- If empty, nothing is added.
¶ Examples
Assume:
- Destination Folder:
C:\Exports\NWC - Model name:
Hospital_A - View name:
NWC_3D_Coordination - Separator in File Name:
- - Prefix in file name (Optional):
CO_ - Suffix in file name (Optional):
_v2
- View Name Only →
CO_NWC_3D_Coordination_v2.nwc - Model Name Only →
CO_Hospital_A_v2.nwc - Model Name And View Name →
CO_Hospital_A-NWC_3D_Coordination_v2.nwc - View Name And Model Name →
CO_NWC_3D_Coordination-Hospital_A_v2.nwc - Custom Naming Convention with
NWC_{ModelName}_{ViewName}→NWC_Hospital_A_NWC_3D_Coordination.nwc
Custom Naming Convention examples you can type:
NWC_{ModelName}_{ViewName}{ViewName}_{Phase}IFC_{Discipline}_{ViewName}
¶ Configure Revit NWC Settings
This is a section title used to group the settings below.
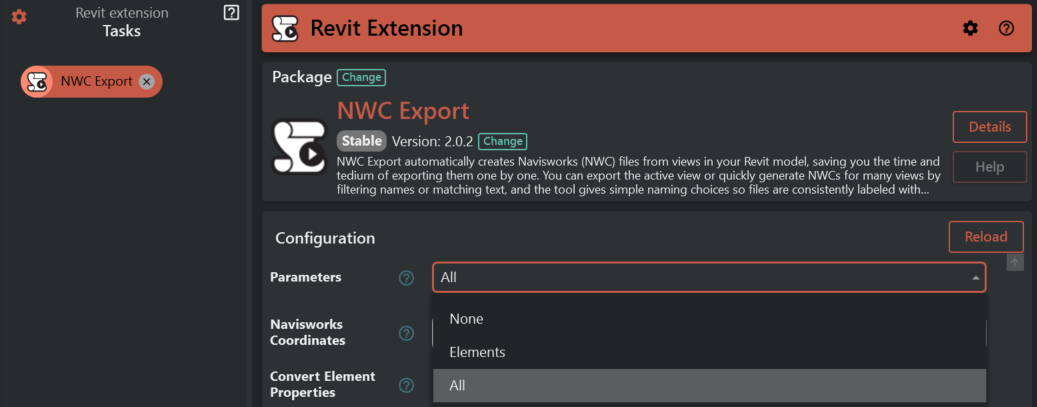
¶ Parameters
- Controls how parameter information is included in the export.
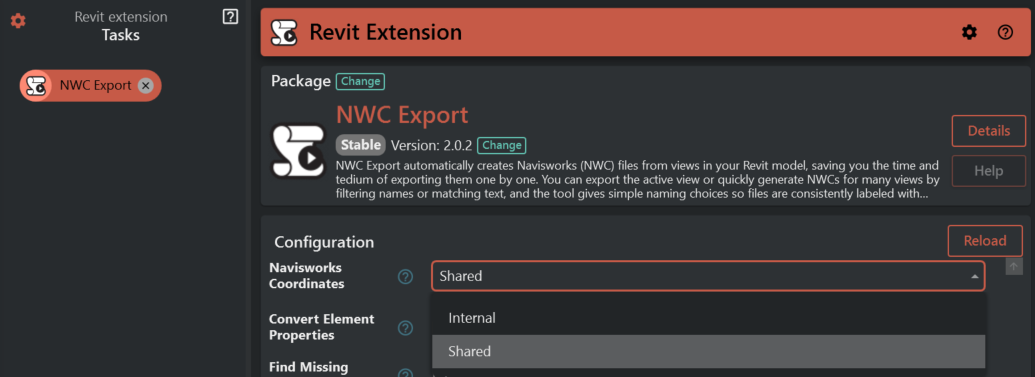
¶ Navisworks Coordinates
- Sets the coordinate system used for the exported file.
¶ Convert Element Properties
- When enabled, more element property information is included.
¶ Find Missing Materials
- Tries to resolve materials that otherwise might be missing.
¶ Divide File Into Levels
- Splits the export into levels.
¶ Export ElementIds
- Includes element IDs in the exported file.
¶ Export Links
- Includes linked models found in the main model.
¶ Export Parts
- Includes Part elements in the export.
¶ Export Room As Attribute
- Exports room information as an attribute.
¶ Export Room Geometry
- Includes room geometry in the export.
¶ Export Urls
- Includes URL information in the export.
¶ Faceting Factor
- Controls how smooth curved geometry looks in the export.
¶ Convert Lights
- Includes lights in the export.
¶ Convert Linked CAD Formats
- Includes linked CAD files in the export.
¶ Results and messages
- If everything succeeds, you’ll see a success message telling you how many files were exported.
- If some exports fail, you’ll see a partial success message including a “Failures” list.
- If the export cannot start (for example, Destination Folder is empty or Navisworks Exporter is missing), you’ll see an error message and nothing (or only some items) will be exported.