¶ Set Active View
¶ Overview
This guide will show you how to activate a specific view in Revit by using the 'Set Active View' task.
¶ Step 1: Accessing the Task
- Look to the right side of the screen to find the 'Available tasks' section.
- Identify and click on the ‘Set Active View’ task.

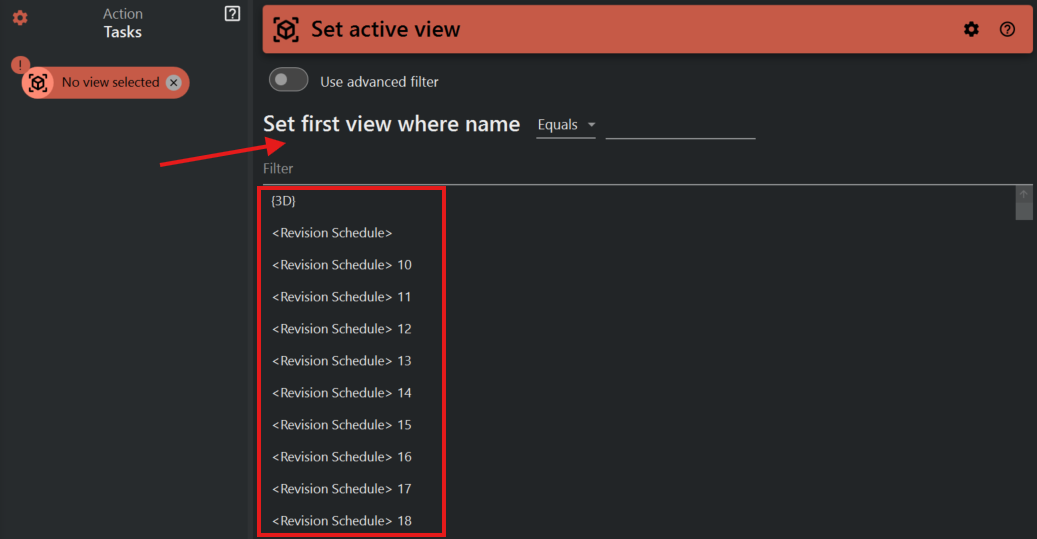
¶ Step 2: Choosing a View with Basic Filter
- A list of views will appear under the 'Set first view where name' heading.
- You can scroll through the list to find and select the desired view.
¶ Step 3: Using the Basic Filter
- If you have a large number of views, use the Filter field to narrow down your choices.
- Type the name or part of the name of the view you're looking for, and the list will adjust to show only the relevant views.
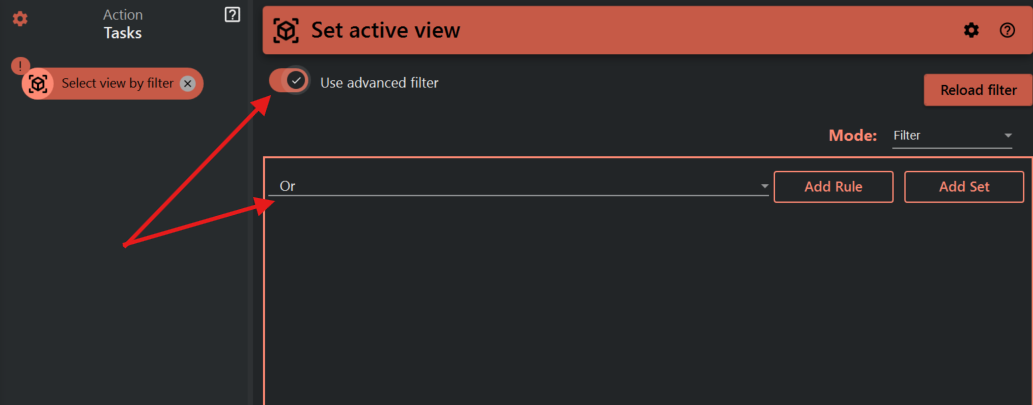
¶ Step 4: Using Advanced Filters
- For more specific needs, toggle on the 'Use advanced filter' option.
- In the advanced filter section, you can define complex rules and sets for filtering views.
- Click on 'Add Rule' or 'Add Set' to create filters based on view properties such as view type, associated level, or other parameters.
- Apply the filters to find the exact view you need.

¶ Step 5: Setting the Active View
- Once you've found and selected the view using either the basic or advanced filter, confirm your selection.
- The chosen view will become the active view in your Revit session.
¶ Important Notes
- The 'Select view by filter' task is useful for quickly navigating to a particular view without scrolling through the Project Browser.
- Using advanced filtering can significantly speed up the process of finding a view if you have a large and complex model with many views.
- Be cautious when using advanced filters, as incorrect filtering can lead to unexpected results or no views being selected.