The Coordination Tool helps you easily coordinate and keep elements up to date in Revit, especially when different teams work in separate files. For example, you can automatically place electrical connections where HVAC equipment needs power and control.
Note: The tool is not limited to electrical and HVAC use cases. You can use almost any element as a reference and place almost any family instance.
¶ Quick Start Guide
Follow these steps to get started with the Coordination Tool:
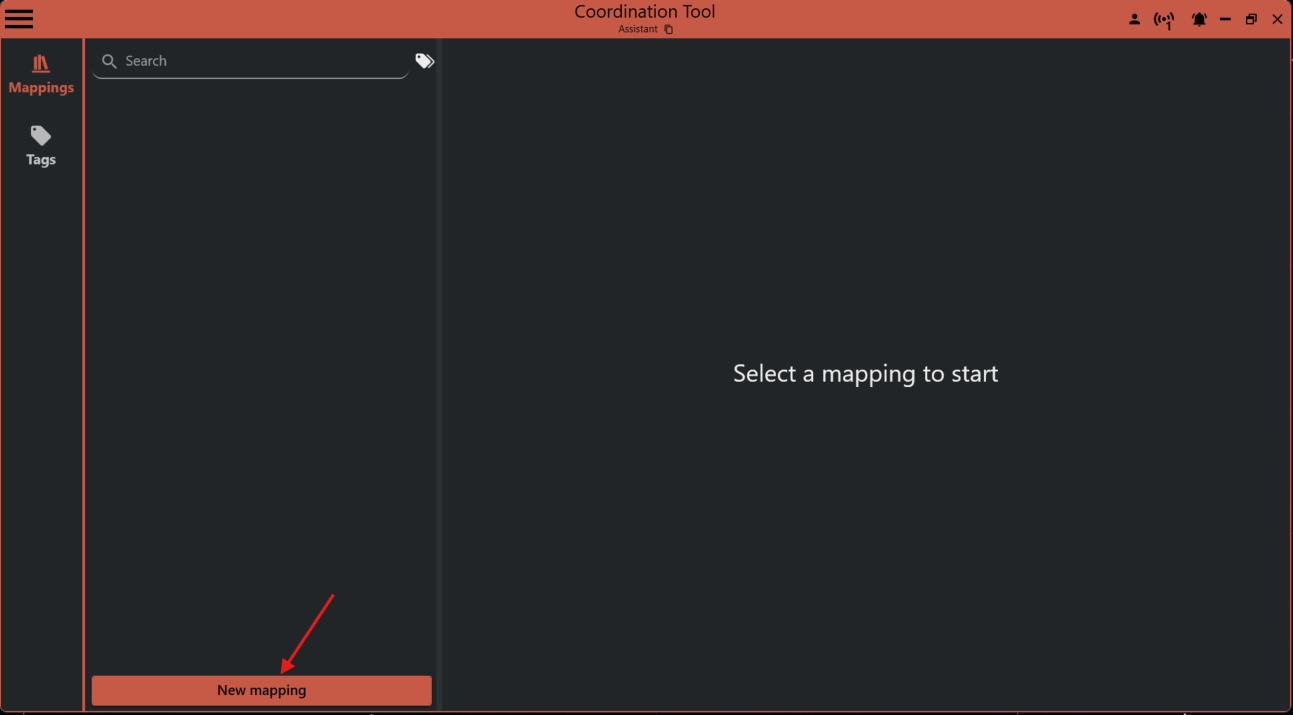
¶ 1. Create a Mapping
Click New Mapping. A step-by-step wizard will guide you through the setup.
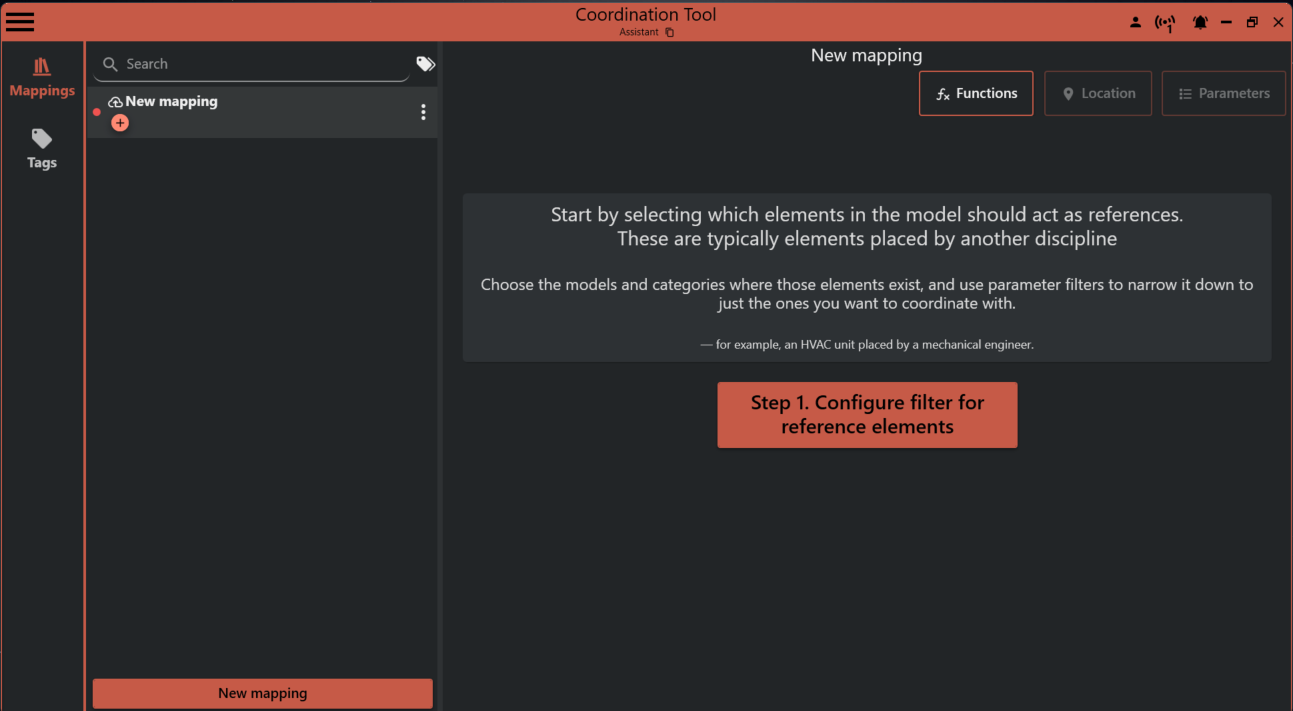
¶ 2. Filter Reference Elements
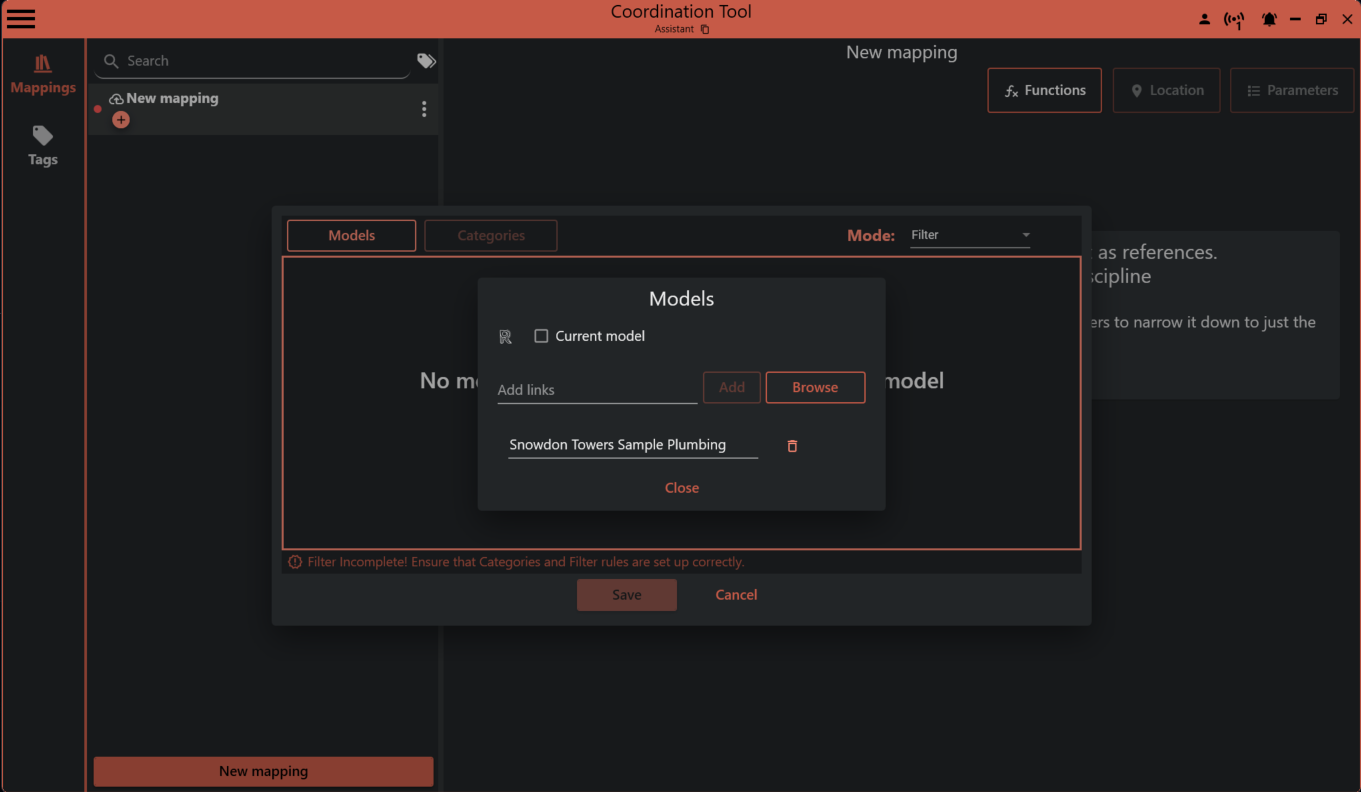
Select one or more models that contain the reference elements. Then, choose the relevant categories for those elements.
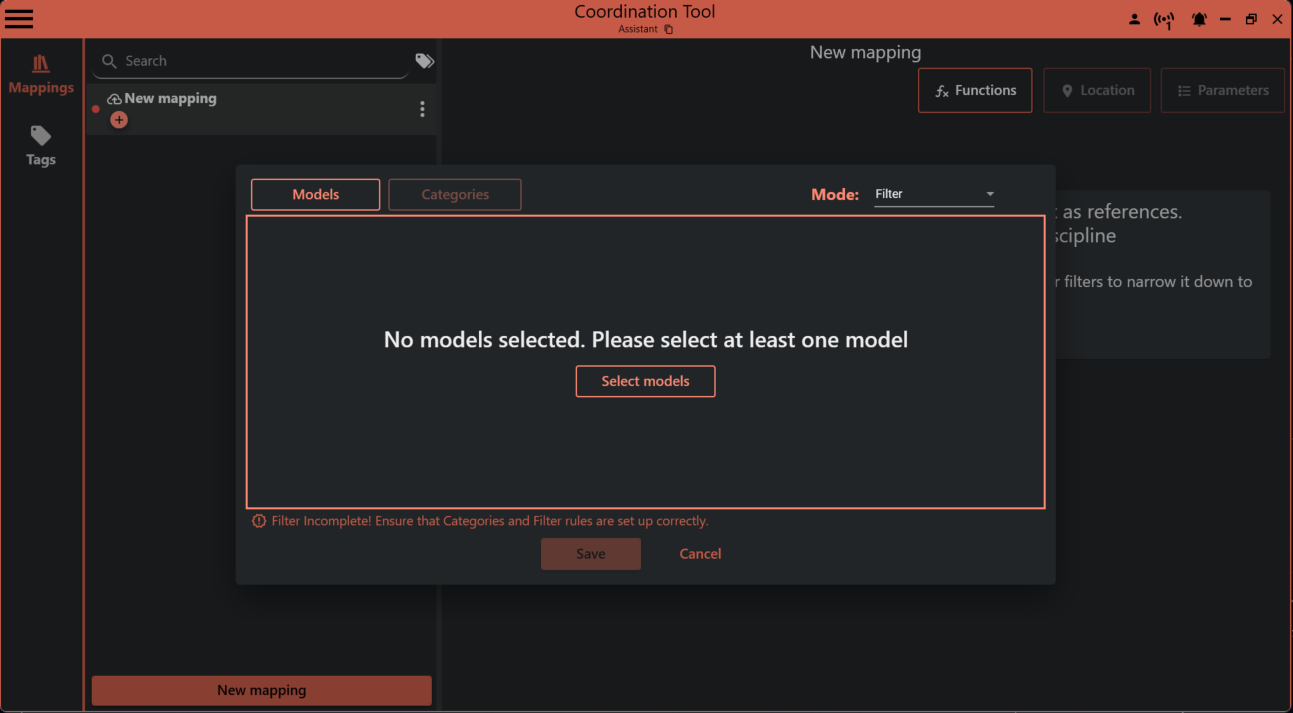
In the models selection you can select the current model or browse for links
In the categories selection you can filter the element based on its Revit Category.
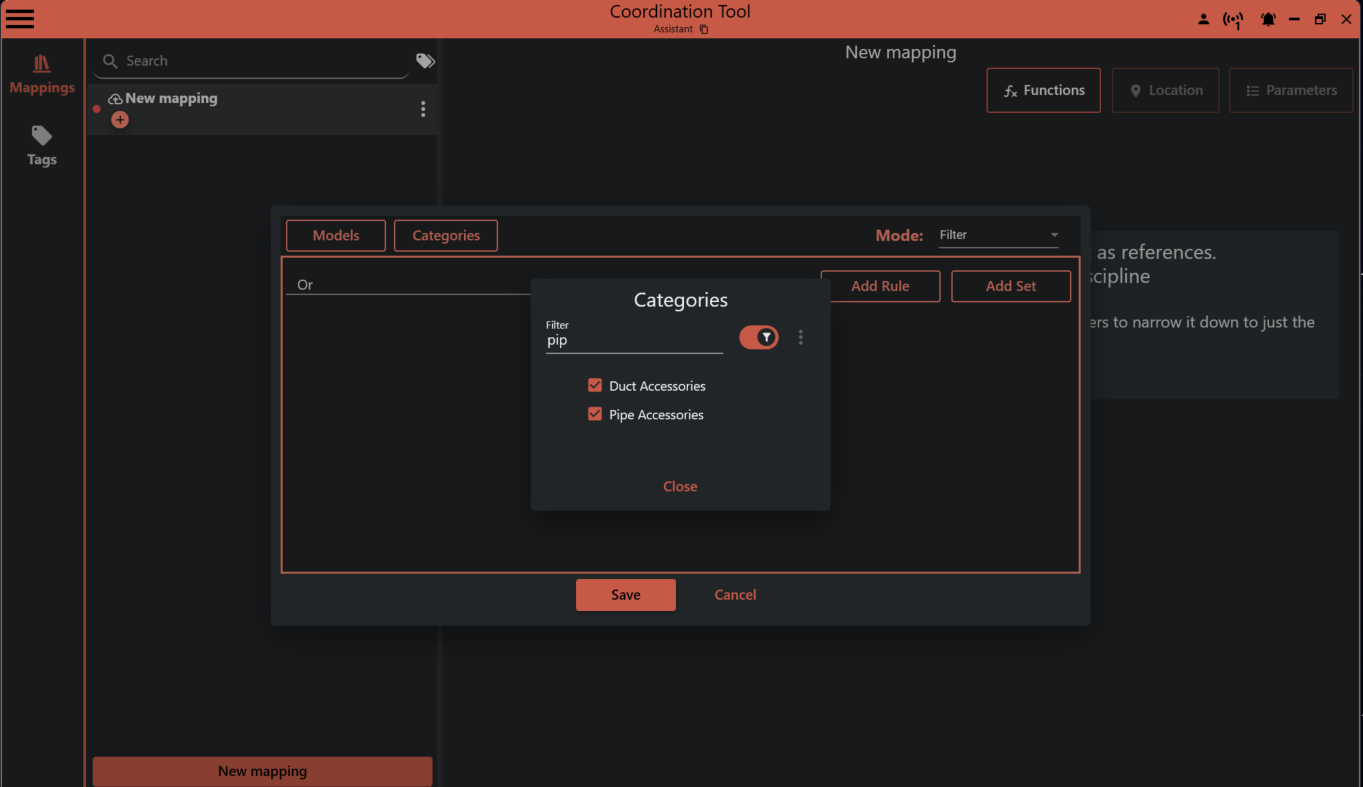
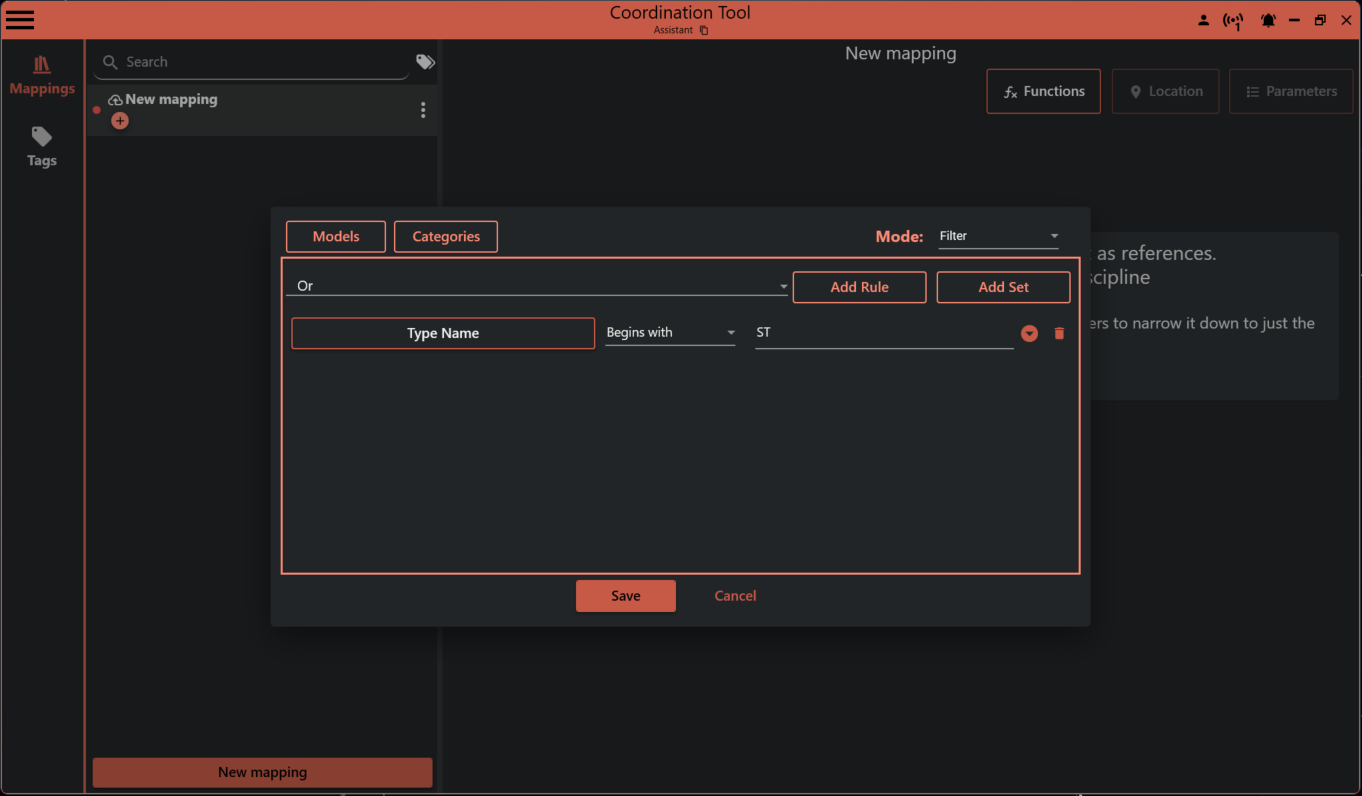
You can use parameter filters to narrow down the selection. For example, filter by type name or any other parameter that the elements have in common.
¶ 3. Select the Type to Place
Next, choose the type of element you want to place.
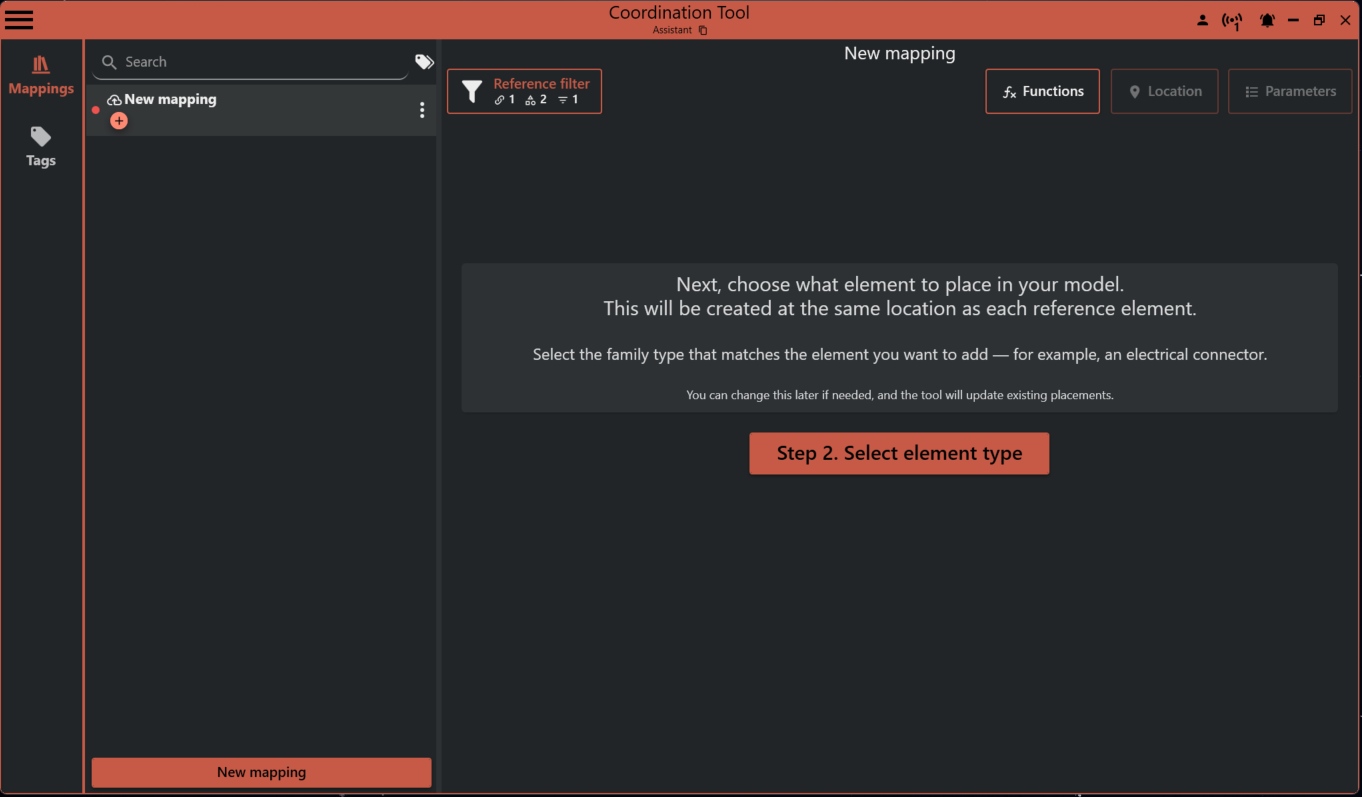
Select a default element to place by pressing the Select element button
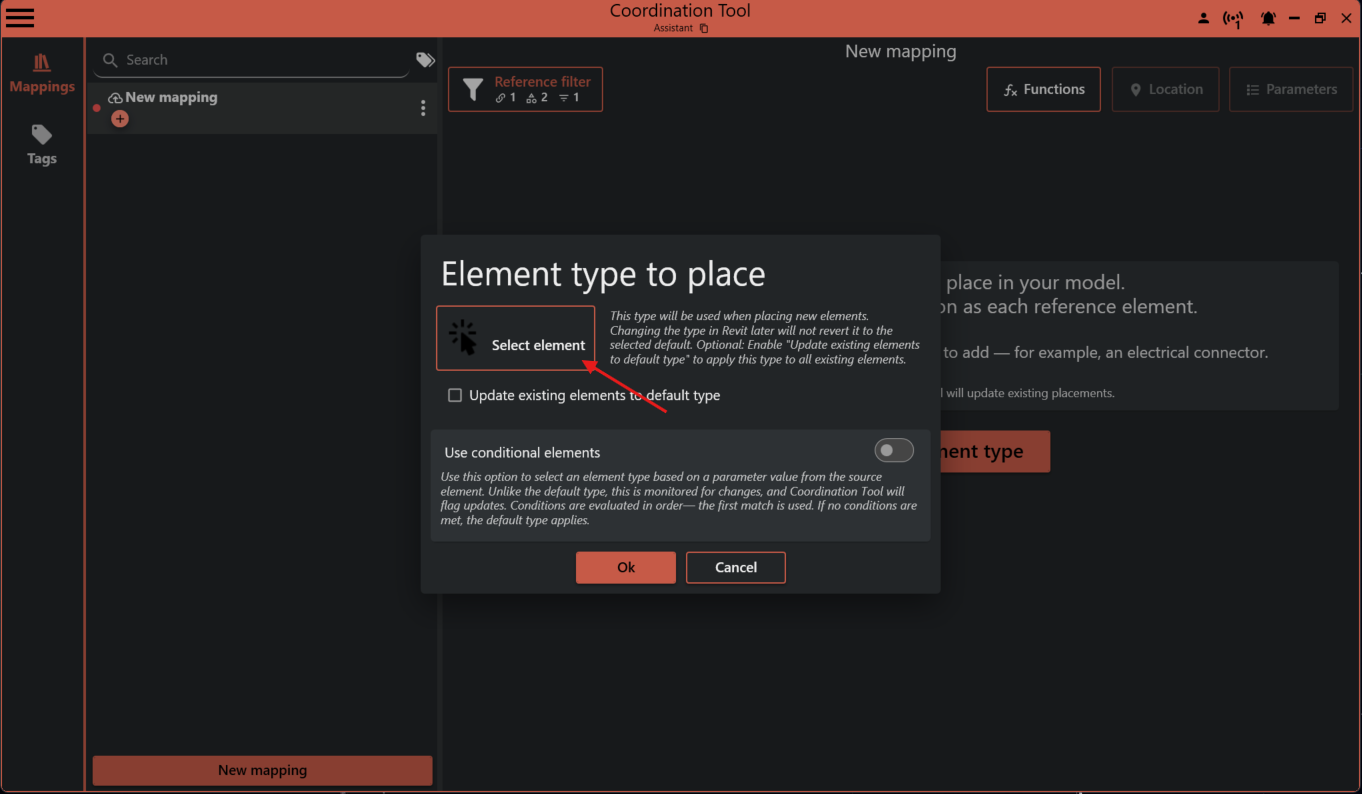
Filter the list of elements by writing family or type name in the filter field or press Select from Revit to click on a placed family in Revit.
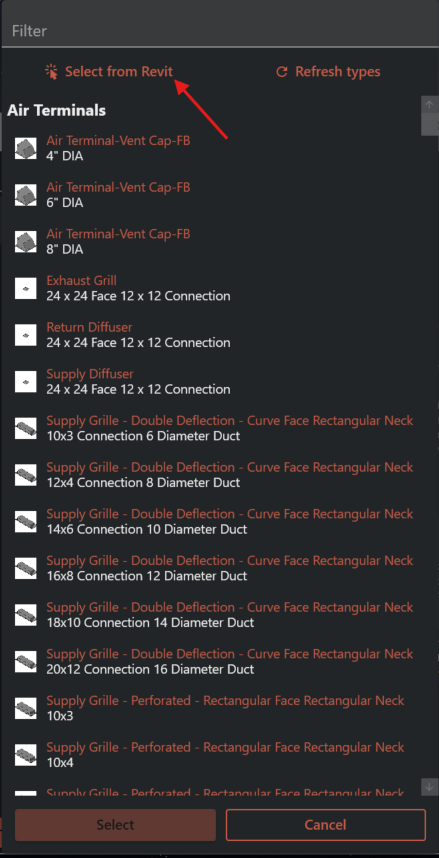
Press Select button to use the element type as a default type. And you will get a preview of the element from Revit and the Family Name and Type presented in the button.
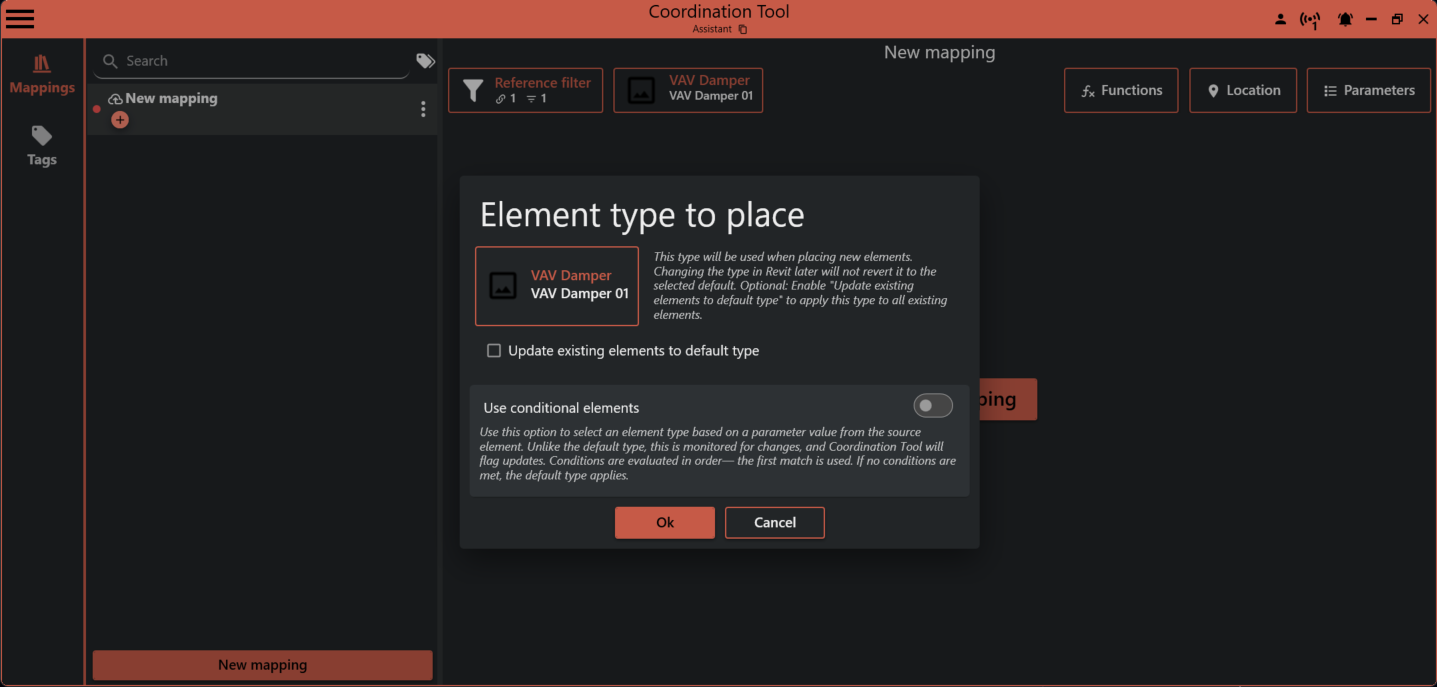
Tip: You can change these settings later. If you do, Coordination Tool will ask if it should update all existing elements.
¶ Review Filter and Element Summaries
The filter and element buttons show summaries to help you understand your current setup:
- Filter Summary: Shows if the current model is selected, the number of links, and the number of categories.
- Element Summary: Shows how many rules and conditional types are set up.
These summaries make it easy to review and adjust your mappings.

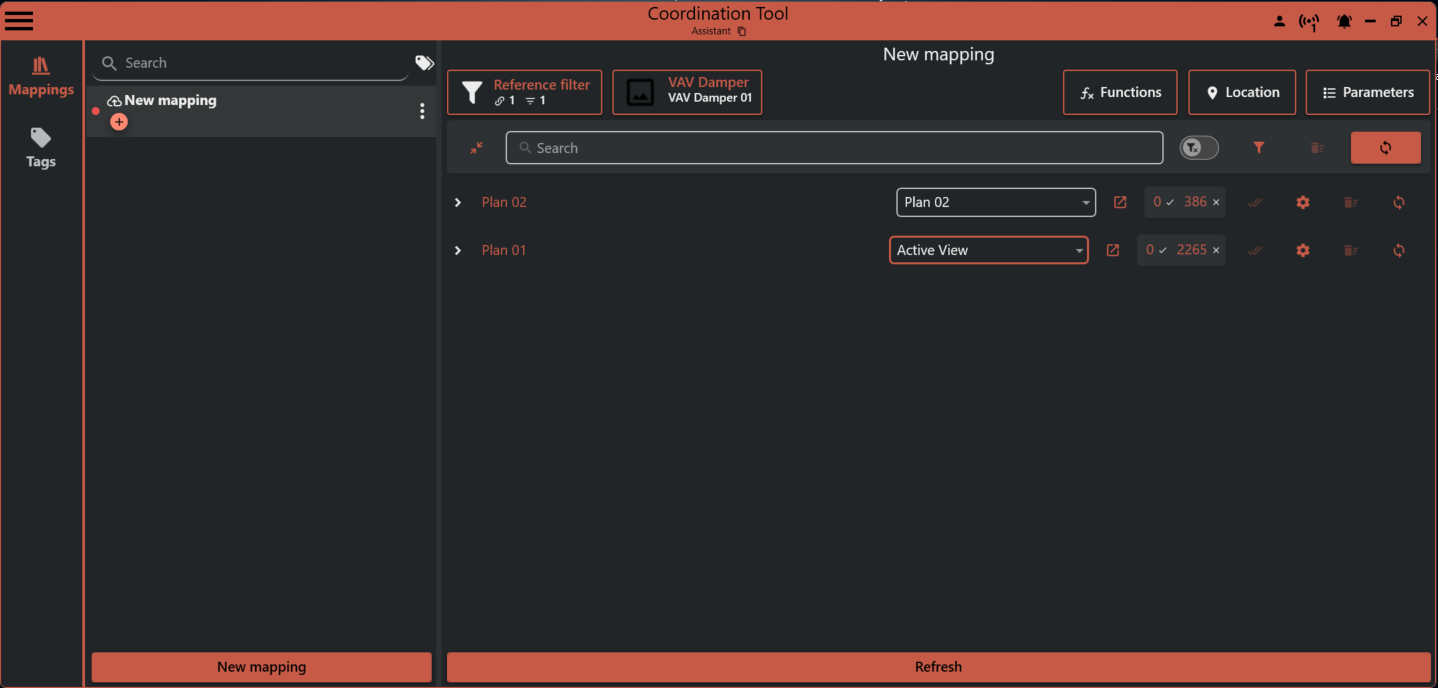
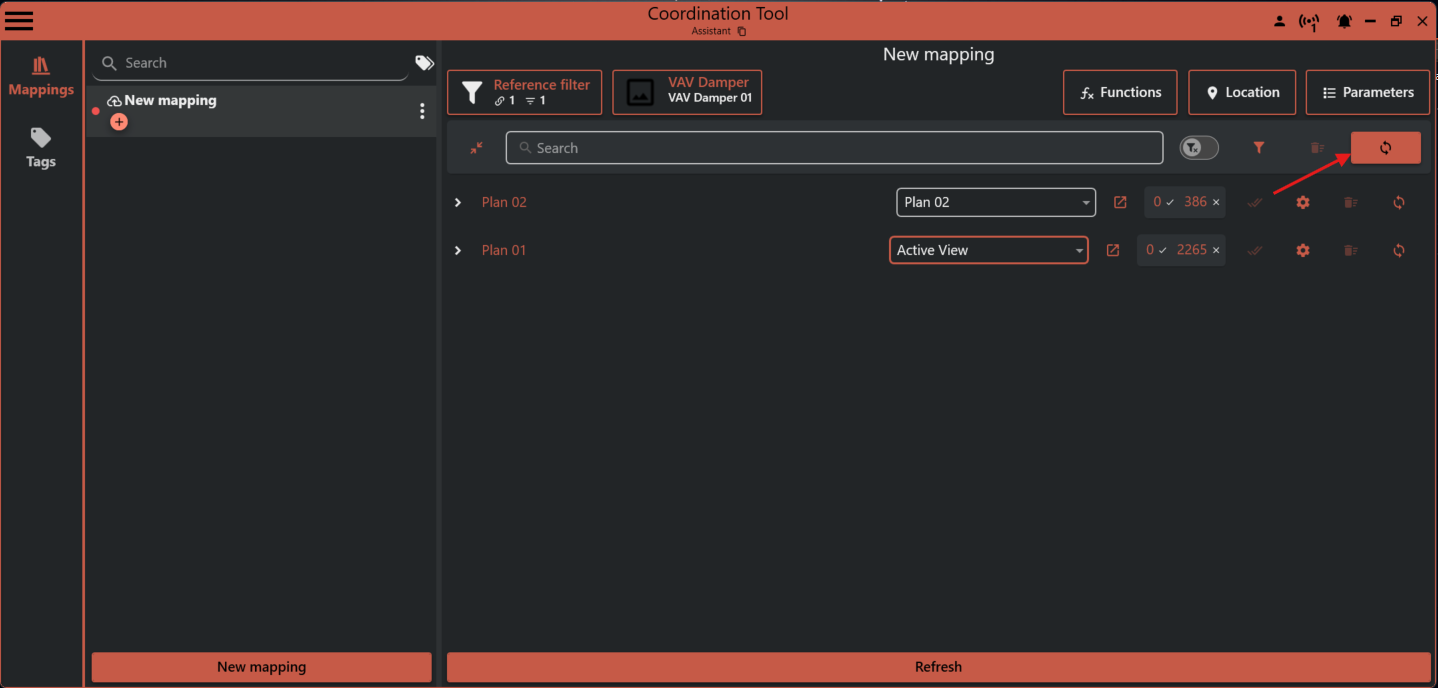
¶ 4. Refresh mapping
Now you do a refresh to collect all reference elements and get a view to take action on them.

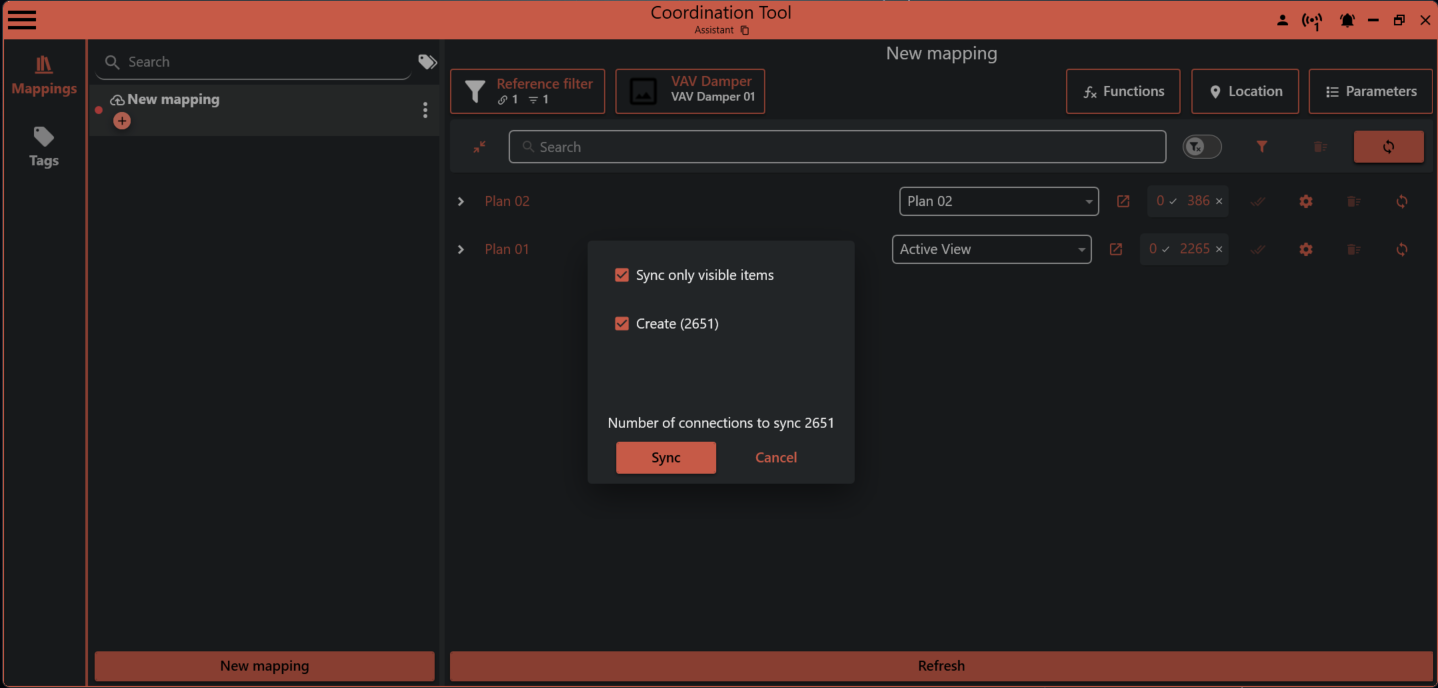
¶ 5. Sync All Instances
Then click Sync to start placing the elements.
A detailed view will open, showing a list of actions. Click Sync to place all the instances in your Revit model.
Default placement is at the origin of the reference element. To change this, see the "Adjust Placement" section below.
Placed elements are grouped by levels. Expand a group to see details about the elements.
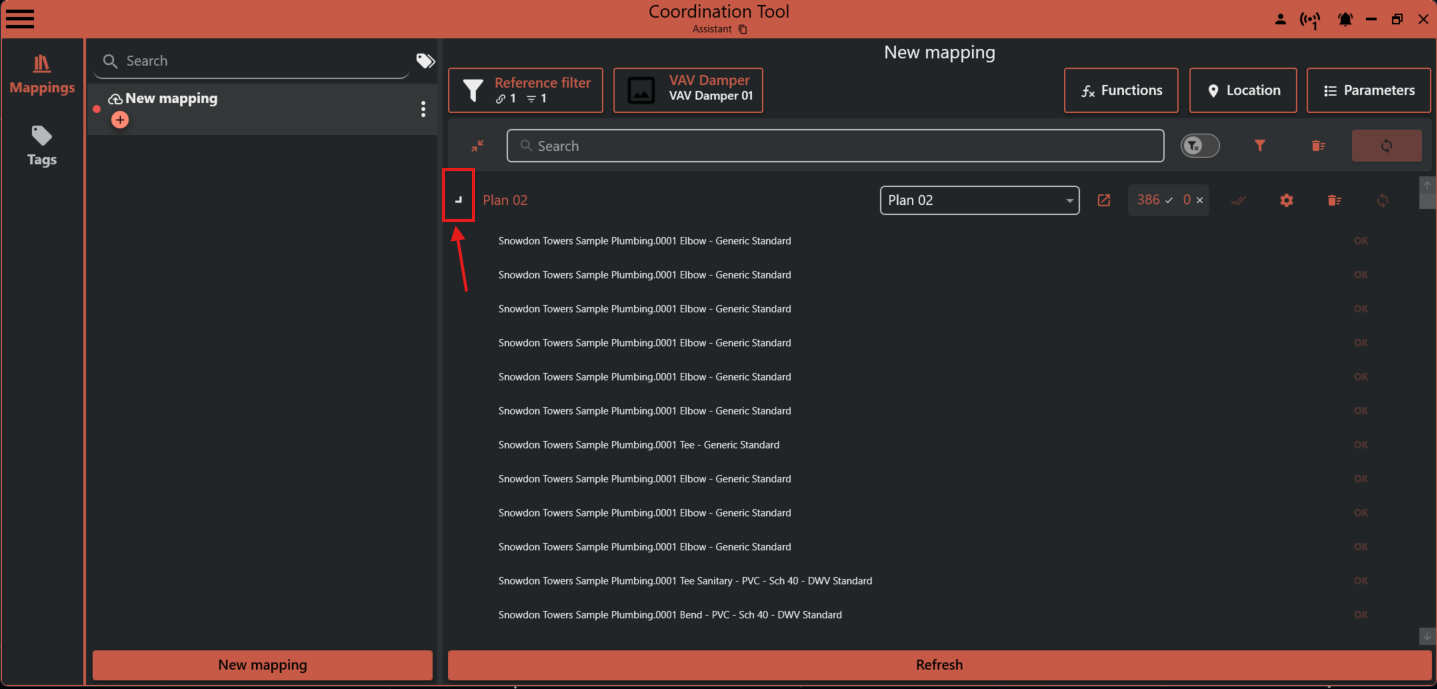
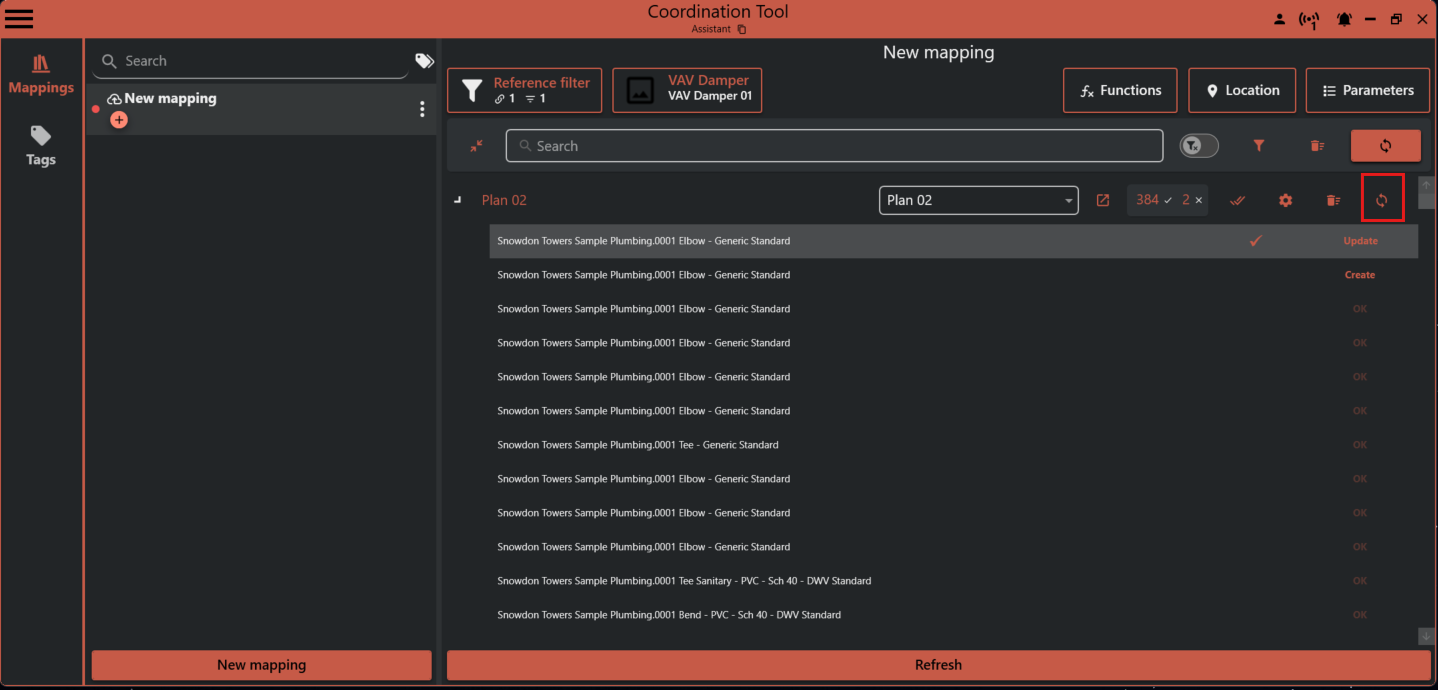
¶ Monitor Changes
To see what has changed since your last sync, open the mapping and click Refresh. Each group shows a summary:
- ✅ Up to date
- ❌ Not up to date
Hover over the status button for more details.

Tip: You can update elements at three levels: the whole mapping, a single level, or an individual placed instance.
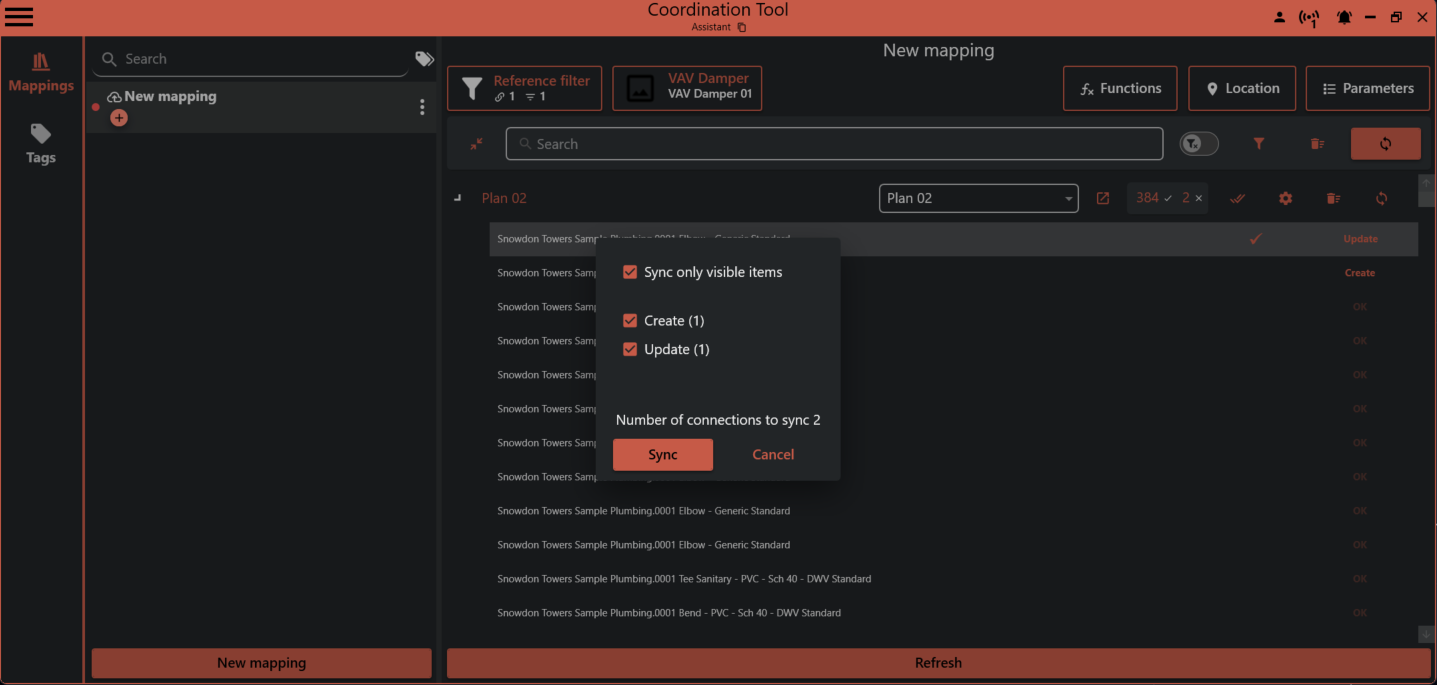
¶ Update the Mapping
To update all elements in a mapping, click Sync.

A detailed view will open. Click Sync to update all selected actions.
¶ Update a Level
To update all elements on a specific level, click the Sync button on that level group.
A detailed view will open. Click Sync to update all selected actions.

¶ Update a Placed Instance
Click the status button to update a single placed instance.
If you want to review an instance before updating, select the row and press Ctrl + G to go to the placed instance in the model.

¶ Configure Parameters
You can set parameter values on placed instances or copy values from the reference element.
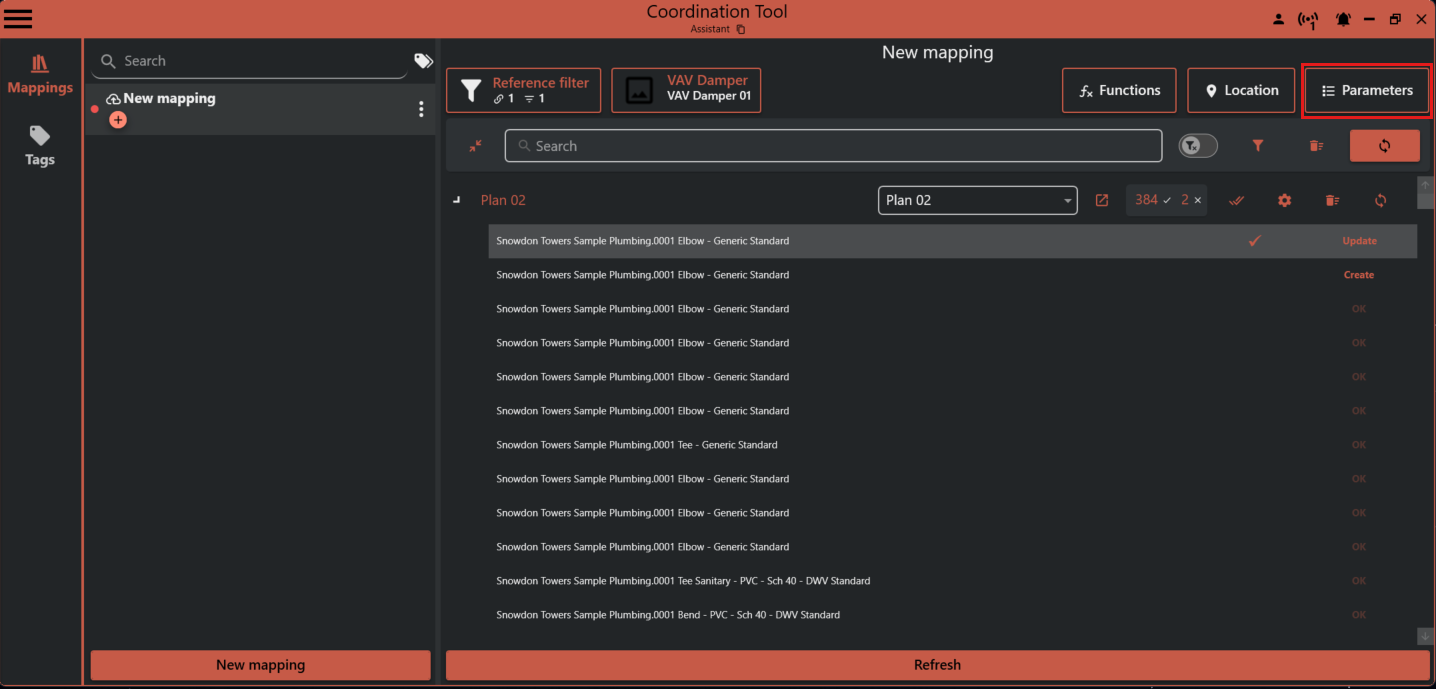
- Set a parameter to a constant: Add a new item, select a parameter, and enter the value you want.
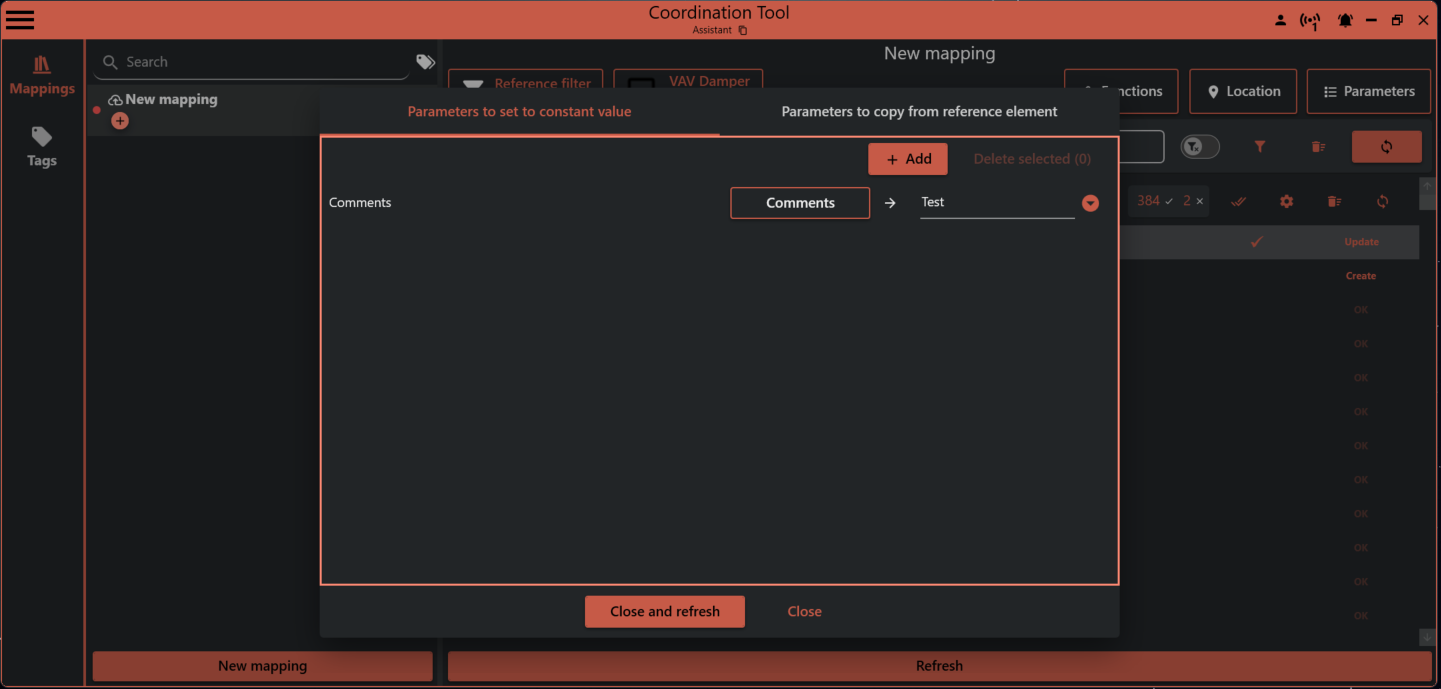
- Copy a parameter from the reference element: Select a parameter from the reference and choose the parameter to write to on the placed instance.
Tip: If you only need part of a value from the reference parameter, use the function button to add a regex function. This lets you extract just the part you need. For help with regex, see https://regexr.com
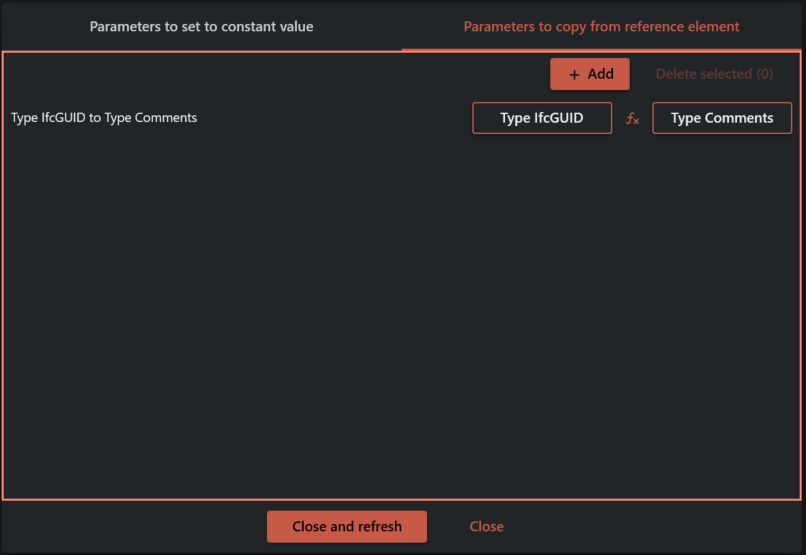
¶ Conditionally element types
You can set up conditional rules to automatically place different element types based on parameter values from the source element. Click "Add conditional element" to create rules that check specific parameters and place corresponding element types when conditions are met.
For example, you can create a rule where if the "MC User Code" parameter contains "SR", a specific element type like "Motorstyrt spjeld" will be placed instead of the default type. If no conditional rules match, the default element type is used.
The conditional elements feature allows you to:
- Define multiple rules based on parameter values from source elements
- Use operators like "Contains", "Equals", or other comparison methods
- Automatically place the most appropriate element type based on source data
- Maintain flexibility by manually overriding placed elements when needed
Note: Coordination Tool will only automatically update elements that match your defined conditional rules. Manually placed or modified elements remain unchanged unless they match a specific rule.
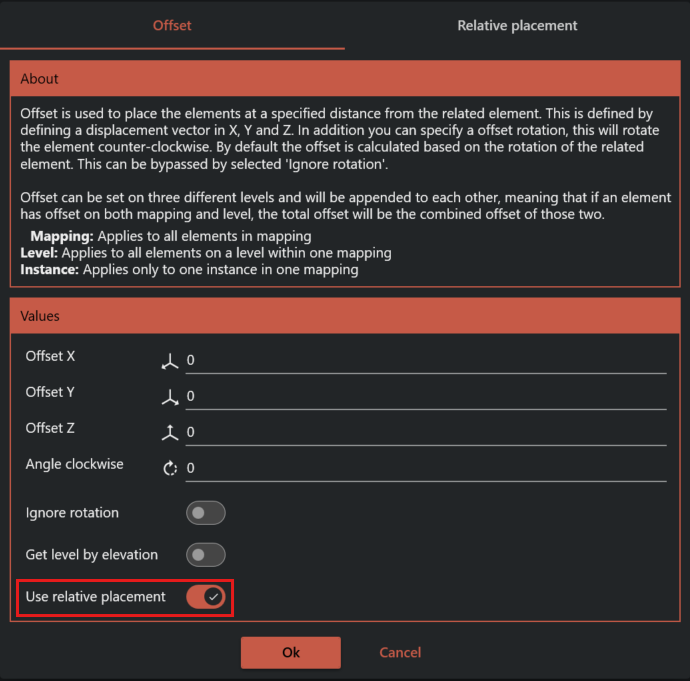
¶ Adjust Placement
If you need to place an element with an offset from the reference element, simply move the element to the desired location and click the check mark to accept the offset.
You can accept the offset for:
- All placed elements in the mapping
- All elements on the same level
- Just the current element
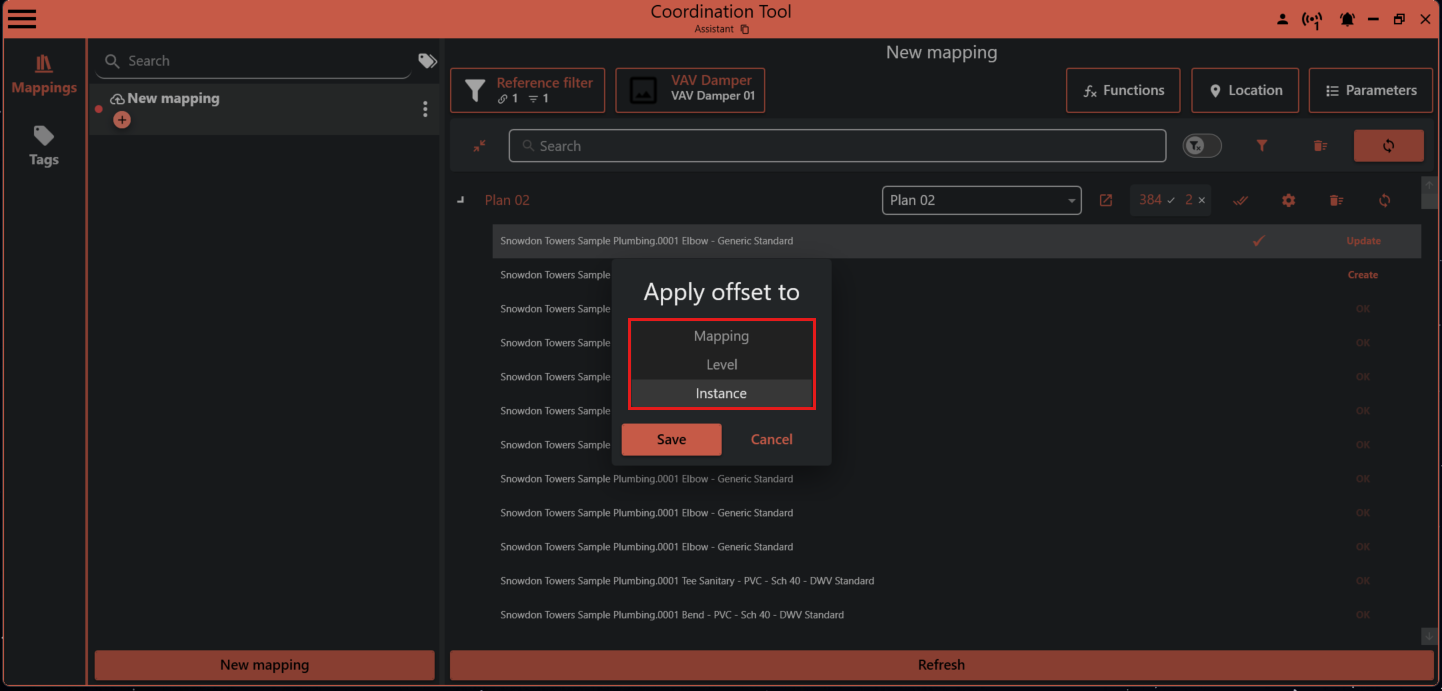
When an offset is overridden, a gear symbol appears. You can edit the override for an element, a level, or the whole mapping using the gear or location symbols.

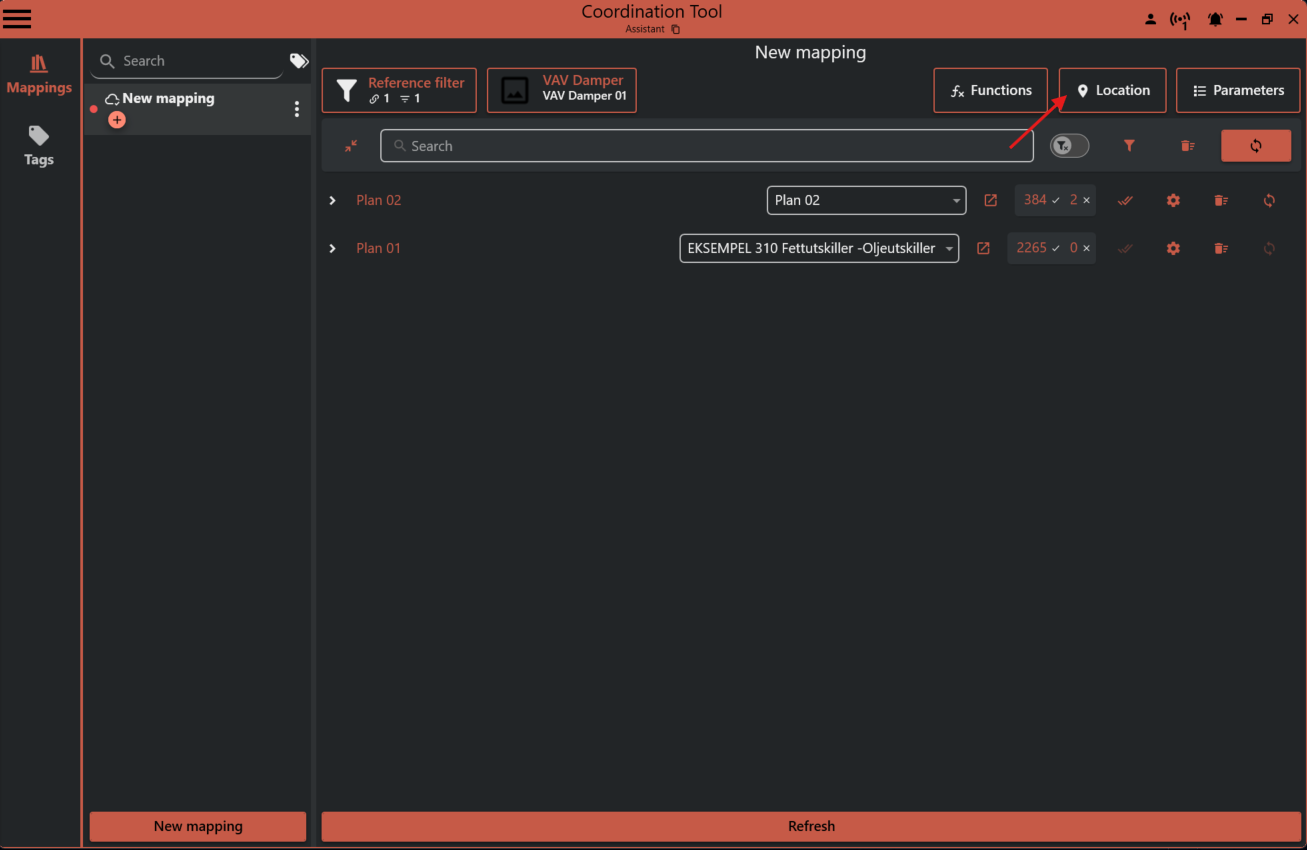
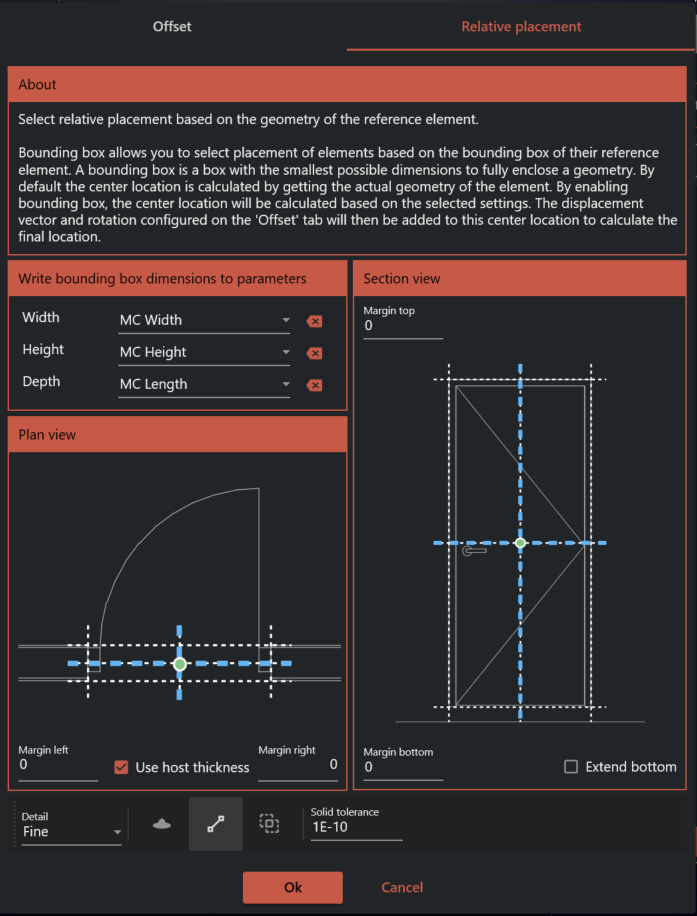
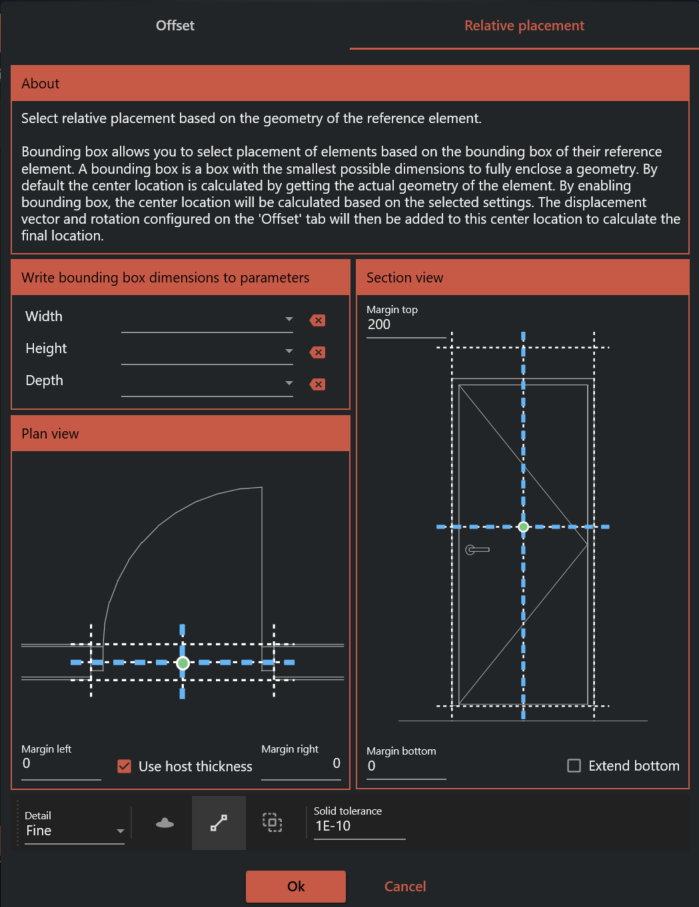
¶ Relative Placement
Relative placement is a powerful mode that lets you place elements relative to the geometry of the reference element.
You’ll see a box around the reference element. You can use any corner or midpoint as the origin for the placed element. By adding margins, you can achieve almost any relative placement you need.
Turn on this mode by clicking the location button and enabling Use relative placement.
See the examples below for inspiration!
The reference element doesn’t have to be a door. Doors are just used in the example because they have many flip controls in Revit, making them perfect for illustrating placement origins.
¶ Example: Place Box
This example places an element with height, width, and depth parameters that match the size of the box around the reference element.
The element’s origin is set to its center (shown by the green dot).
The box size is written to MC Width, MC Height, and MC Length parameters. The depth size can be extended to the host of the reference element (if any) using the Use host thickness option.
¶ Example: Place Switch by Door
This example shows how to place a switch 150 mm from the hand side of a door and 900 mm from the bottom. The host thickness is used so the switch is placed on the face of the wall.

¶ Example: Place Emergency Light Above Door
This example shows how to place an element (like an emergency light) 200 mm above the center of a door. The host thickness is used so the light is placed on the face of the wall.
¶ Multi-User Worksharing
When working in a shared Revit project, each mapping in Coordination Tool acts like a checked-out element. When you open a mapping, only you can make changes to it until you finish and save (sync) your work. Other users cannot open or edit the same mapping at the same time. This prevents conflicts and ensures only one person updates a mapping at a time, making teamwork smoother and more reliable.
¶ Working with Groups
¶ Group Origin and Rotation
To get the rotation of a group instance, add an origin family inside the group. The family can be anything, but its type name must contain "GROUP_ORIGO" (not case sensitive, so "Group_Origo" or "group_origo" also work).