¶ Revit Extension Interface
The IRevitExtension interface is a fundamental component for developing extensions in Autodesk Revit. It shares similarities with the more general IAssistantExtension but provides specific features tailored for Revit.
For a detailed guide on developing extensions, please refer to the Assistant .NET Extension Development Guide. This guide covers the basics of creating .NET extensions for Assistant, and many of these concepts can be applied to Revit extensions as well.
A RevitAppExtension template that enables users to create fully interactive, MVVM-based Revit Extensions with a modern WPF UI is available. This template provides a foundation for building rich, user-friendly applications with support for data binding, command patterns, and seamless UI interactions. For a detailed guide on developing Revit App Extensions, please refer to the Revit App Extension .NET Extension Development Guide
¶ Key Differences
While the core concepts of developing extensions remain consistent, there are key distinctions when it comes to Revit extensions. Here's an overview:
-
Revit-Specific Operations: The
IRevitExtensioninterface enables direct interaction with Autodesk Revit elements. In your extension's implementation, you can access the Revit model, select elements, and modify them as needed. -
Revit Context: The
RevitExtensionContextprovides a context specifically tailored for Revit extensions. It grants access to the Revit UI Application and the active Revit document, enabling your extension to perform operations within the Revit environment.
Here's an example implementation of an IRevitExtension:
public class RevitExtensionCommand : IRevitExtension<RevitExtensionArgs>
{
    public IExtensionResult Run(IRevitExtensionContext context, RevitExtensionArgs args, CancellationToken cancellationToken)
    {
        var document = context.UIApplication.ActiveUIDocument?.Document;

        if (document is null)
            return Result.Text.Failed("Revit has no active model open");

        // Get selected element ids in the model
        var selectedObjects = context.UIApplication.ActiveUIDocument.Selection.GetElementIds();

        // Create a transaction to modify the model
        using var transaction = new Transaction(document, "RevitExtension");
        transaction.Start();

        // Modify the model
        foreach (var elementId in selectedObjects)
        {
            var element = document.GetElement(elementId);
            // Perform operations on Revit elements
        }

        transaction.Commit();

        // Create a message with the input text
        var message = $"Input = {args.TextInput}";

        // Return a result with the message
        return Result.Text.Succeeded(message);
    }
}
This implementation demonstrates the use of the IRevitExtension to perform operations within Autodesk Revit.
For more in-depth guidance, you can always refer to the Assistant .NET Extension Development Guide and apply the principles to your Revit extensions.
¶ Custom Revit Autofill collectors
The [CustomRevitAutoFill] attribute is similar to the generic [CustomAutoFill] attribute. You can implement custom autofill collectors for Revit and Tekla extension types and the generic one CustomAutoFill works for all extension types.
Here is an example for CustomRevitAutoFill:
public class ExtensionArgs
{
    [CustomRevitAutoFill(typeof(ParameterAutoFillCollector))]
    public List<string> ParameterNames { get; set; }
}

public class ParameterAutoFillCollector : IRevitAutoFillCollector<ExtensionArgs>
{
    public Dictionary<string, string> Get(UIApplication uiApplication, ExtensionArgs args)
    {
        var result = new Dictionary<string, string>();

        try
        {
            // Access to active revit model
            var document = uiApplication.ActiveUIDocument.Document;

            // Simulate fetching shared parameter names
            var parameterNames = new List<string>
            {
                "Parameter1",
                "Parameter2",
                "Parameter3",
            };

            foreach (var parameterName in parameterNames)
            {
                result.Add(parameterName, parameterName);
            }
        }
        catch (Exception e)
        {
            result.Add(string.Empty, $"Failed to get autofill: {e.Message}");
        }

        return result;
    }
}
This CustomRevitAutoFill example demonstrates how to implement autofill collectors for Revit extensions. It's a powerful tool to enhance your extensions by providing intelligent suggestions for user input.
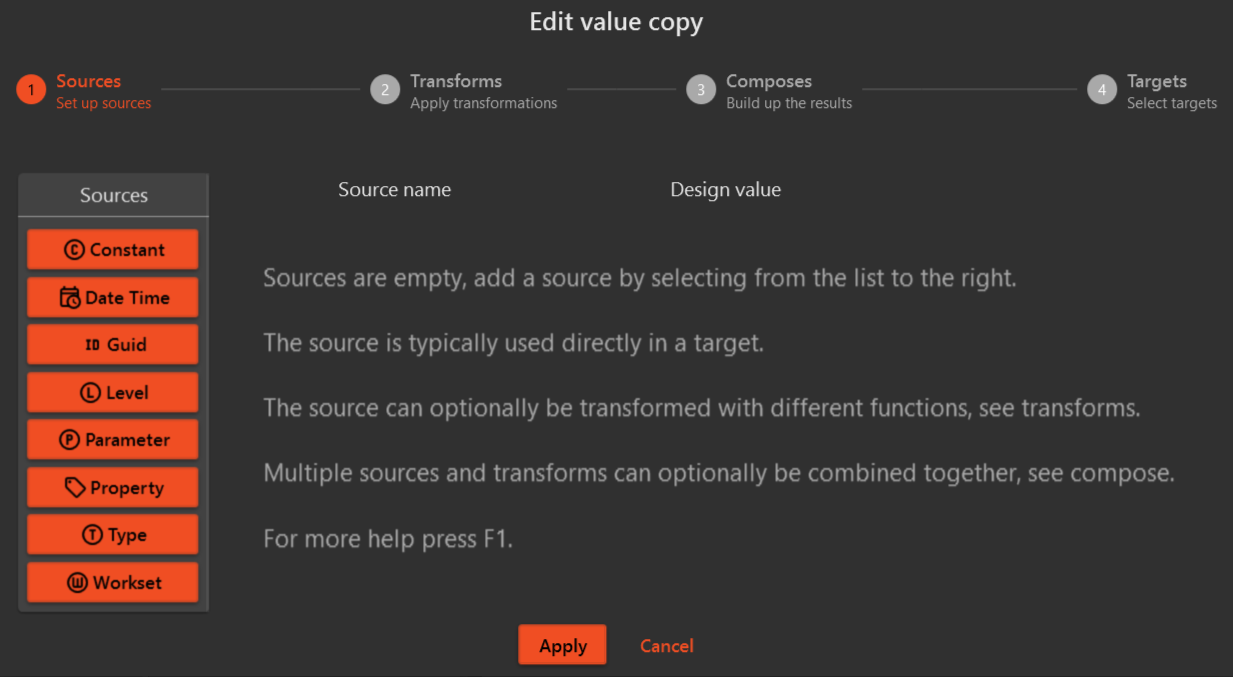
¶ Value copy
ValueCopy for Revit in the Extension Args enables the user to perform advanced parameter and property value copy between elements
¶ Implementing ValueCopy in the args class
Add ValueCopy control to the args by using the following code or use the code snippet 'control-type-valuecopy-revit' in vs code
[ValueCopyCollector(typeof(ValueCopyRevitCollector))]
public ValueCopy ValueCopy { get; set; }


public class ValueCopyRevitCollector : IValueCopyRevitCollector<MacroDemoArgs>
{
        public ValueCopyRevitSources GetSources(IValueCopyRevitContext context, MacroDemoArgs args)
    {
    		var filter = new FilteredElementCollector(context.Document).WhereElementIsElementType();
        return new ValueCopyRevitSources(filter);
        }

        public ValueCopyRevitTargets GetTargets(IValueCopyRevitContext context, MacroDemoArgs args)
    {
    		var filter = new FilteredElementCollector(context.Document).WhereElementIsElementType();
        return new ValueCopyRevitTargets(filter);
        }
}
This will add a UI field to your extension

On clicking the "Configure Value Copy" button, it will open a pop-up for configuring the Value Copy
Read more about Value Copy Configuration here: Value-Copy
You can control what parameters and properties to be displayed to the user in the sources and targets by editing the "GetSources" and "GetTargets" methods in the "ValueCopyRevitCollector" class.
For eg., if the "GetSources" method returns the following code,
return FilteredElementCollector(context.Document).OfCategory(BuiltInCategory.OST_Walls);
Only parameters and properties of the "Wall" category will be displayed when you want to add a Parameter or Property source to the configuration.And the same logic applies for targets.
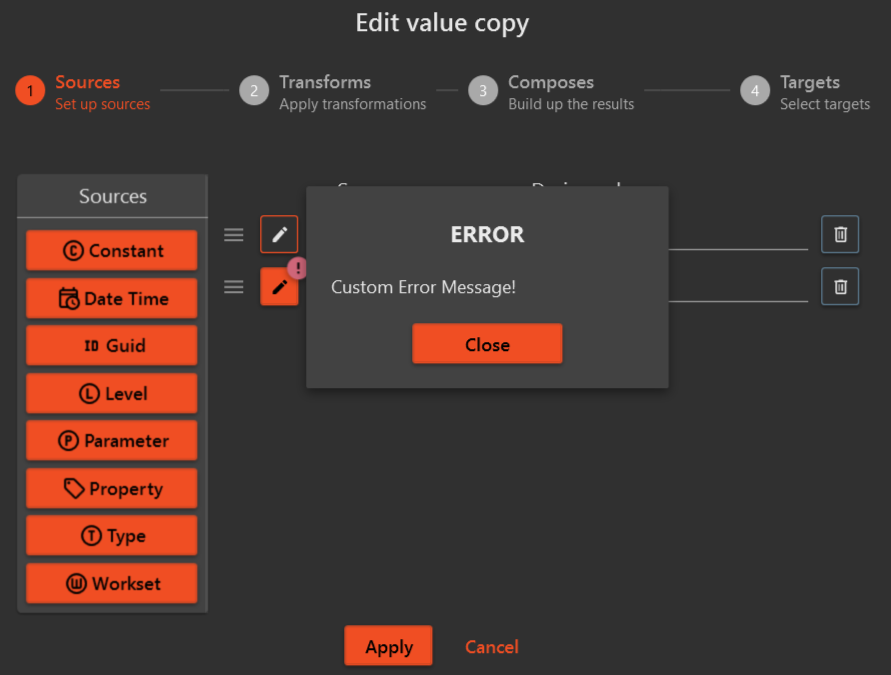
¶ Exception Handling
When you catch exceptions in the ValueCopyRevitCollector class, you can throw them to the user with the a custom message by using the following code,
throw new InvalidConfigurationException("Custom Error Message!");
This message will be displayed to the user when they try to select a Parameter or a Property from the configuration window.
¶ Using the ValueCopy args in the Command
var valueCopyHandler = context.GetHandler(args.ValueCopy);

//Copy/Set values from one element to another
var result = valueCopyHandler.Handle(sourceElement, targetElement);

//Copy/Set values within the same element
var result = valueCopyHandler.Handle(targetElement);

//Copy values from one element to multiple elements
var results = valueCopyHandler.Handle(sourceElement, targetElements);
//where targetElements is a List<Element>()
You can find a sample implementation of the "Value Copy" in the MacroDemo project: MacroDemo